Windows 10 : How To Print Screen
How To Print Screen In Windows 10 And Other OS
Sometimes, it’s required to keep a copy of your pc screen for reference. For example, if you are going to pay for anything online then you can capture it as a screenshot. Screenshot and print screen are the same things in windows OS. Same as other built-in features, Microsoft includes many small and smart tools for screen printing. If you know all about them then you can easily capture a pc screen as a screenshot.
There are several ways to take a screenshot on windows 10 and other OS. Learn all about them and then choose the right one technique to copy the window or screen contents. Here in this “how to print screen in windows 10”, we are adding only free tools provided by Microsoft officials. You no need to download any third party screen capture pc software.
Each and every screenshot tool has its own quality and customization ability. So, you can find the best way to take screenshot on pc and laptop according to your own choice.
- Windows 10 comes with several different built-in screenshot tools and software.
- Fastest way to take a screenshot on Windows 10 is the “PrtSc” key that allows you to capture the screen in one click.
- For a custom screenshot, use the windows snipping tool.
- During the gaming, you can use the Game bar (windows + G) shortcut.
After reading the above highlights, you can see Microsoft offers different ways to save the entire screen or specific area of the screen.
Method 01 PrtScn Key To Take A Screenshot On Windows 10 PC/Laptop
Screenshot with PrtScn key is the best and fastest way for all windows 7 / windows 10 / windows XP. Open any screen on the PC that you want to capture and press the “PrtScn” key from the keyboard. This action will capture the entire screen on the clipboard and then you can paste it in Microsoft Word or paint etc.
It’s usually labeled as “prtScn” or “PrintScn”, just after the F12 key. If you are doing the same from laptop, then you have to press & hold function key and then press “prtscn key”.
Direct PrtScn key copies the entire pc screen on clipboard as a screenshot. But there are several Prtscn variations also available to use it efficiently.
Modifier Keys For PrtScn
Press PrtScn : Press the prtscn key from the keyboard and it will store the captured screenshot on the clipboard. After that you can paste it anywhere like paint and MS word etc.
Press Alt + PrtScn Key : This is an alternative key combination of “prtscn key”.

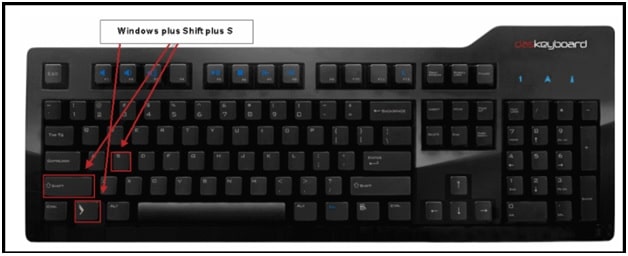
Press windows Logo key + Shift + S : If you want to capture any specific area from the screen then use the windows + Shift + S key. These keys combination will dim the screen light, mouse pointer will change and then you can drag the mouse pointer to select a portion of the screen to capture. Selected portion will capture on the clipboard which can be saved anywhere on pc.
Options for custom snips – Rectangular Snip, Freedom Snip, windows Snip and Full Screen Snip.
Press Windows Key + PrtScn : These keys combination will take screenshot of entire pc screen and save it into the “Picture” folder of your pc. This method is useful if you want to take multiple screenshots. You no need to paste the clipboard items manually.
Method 02 Take Screenshots On Windows 10 Using Snipping Tool
Each and every windows operating software (OS) including windows 10 comes with a pre-installed screenshot utility tool which is known as “Snipping Tool”. Actually, this official windows screenshot tool helps users to take screenshots of an active window. Best thing is that we can capture the entire screen or selected area of the screen with a windows snipping tool. Mostly, this tool is used for custom screen capturing.
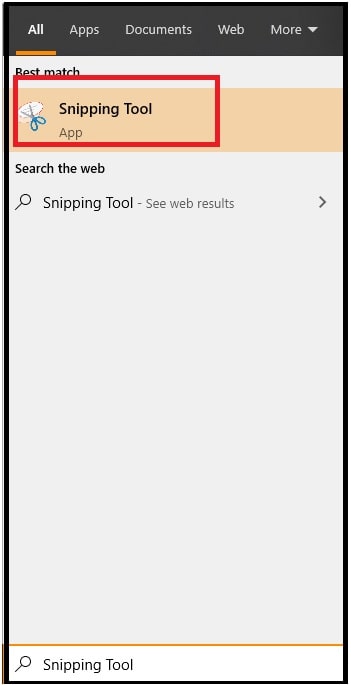
- Simply type the snipping tool in the search box and then click on the “Snipping Tool” from the search suggestion.
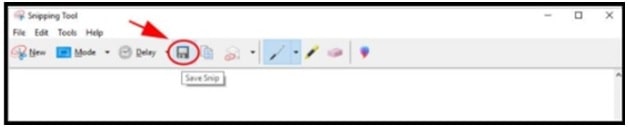
- Now click the “New” option from the tool and then click the “Mode” drop down to choose the desired snip types.

- Select the area of the screen that you want to capture and then click the “save snip” button to save your screenshot.
Please Note :
Here you have to choose the desired folder or location to save the new screenshot.
If you want to copy the screenshot instead of saving, then click the Copy option and it will copy the screenshot to the clipboard.
In this way, you can easily print screens on windows 10 laptop or pc with Microsoft snipping tool.
Method 03 Take Screenshot Using Game Bar
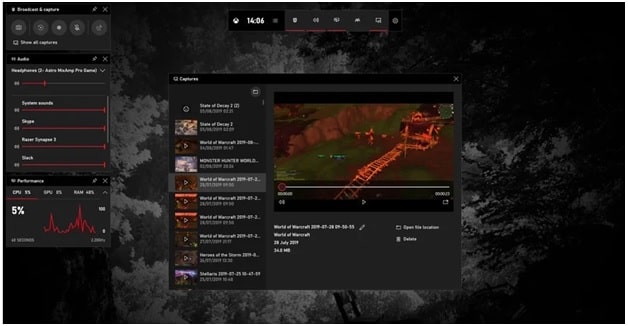
Sometimes, other screenshot keys combinations may not work during the gaming. To resolve this issue, Microsoft includes the Game Bar functionality with every windows OS. The game bar is an overly that can be used within every game to take screenshot, record videos and stream directly from a game without the need of external software.
When you are playing a game on your pc or laptop, open the Game bar using keys shortcut and start capturing the game screen instantly. In short, Game Bar allows you to create content directly from your game.
To do this, press the windows logo key + F from the keyboard and access the Game Bar functions.
In case, Game bar is not working in windows 10 that means you may have bound it to something else! Enable the windows 10 Game Bar by following the below steps.
- Open “settings” on pc.
- Select the “Gaming” from Settings Menu.
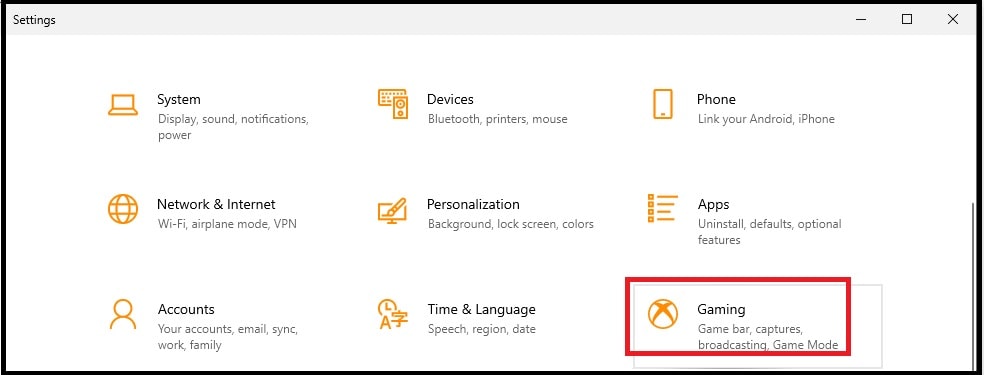
- Enable the “Game Bar” by moving the toggle key or set it as shown below.

Method 04 Third Party Software For Screenshots
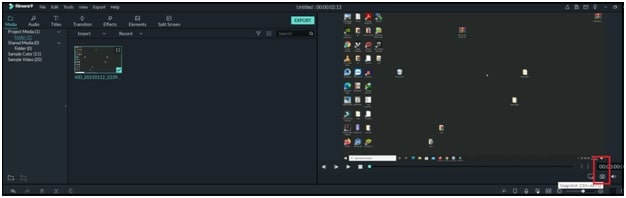
All the above methods are working and tested free tools for the Windows screenshot process. But, if none of the default options are quite your thing then you can use third party software. Wonder share filmora is the best option for this.
Officially this tool is a paid pc software but you can also get its patch files to use it as a free software. As we already said, the Filmora pc tool is a video editor but we can also use this to record videos and screenshots in one click.
- Download and install free Filmora software in your pc
- Run the software as administrator.
- Open the screen that you want to record for a screenshot.
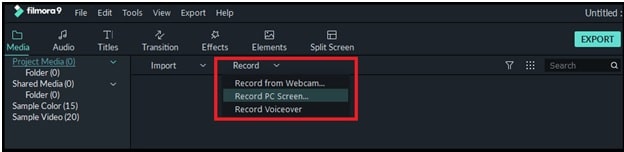
- Once the tool launches on the PC, click on “Record” button, select the recording options and start recording on your pc. For example click on the “Record Pc screen” option to record the entire screen on your pc.
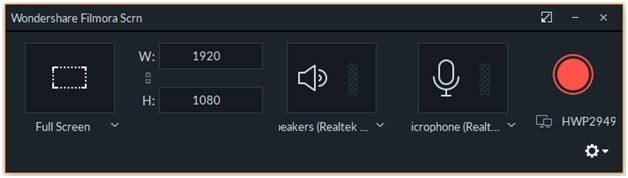
- Now a new window will open in front of you. Click on the “Red Recording” button and it will start capturing after the countdown.
- Stop the screen capturing by pressing the F9 key from the keyboard and the recorded clip will add into software.
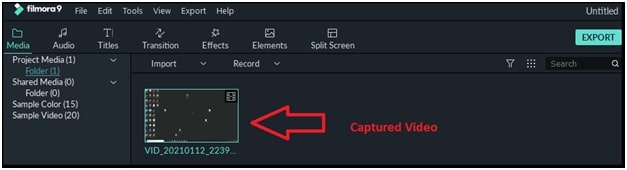
- Next, add this video into the timeline below and then click on the “Screenshot” icon to take screenshots.
- Now you can find this captured screenshot into “This PC >> Documents >> Wondershare Filmora 9 >> User media >> Snapshot”.
These are all possible Microsoft windows print screen methods. Try to check every print screen windows PC tool yourself and get the perfect screenshot tool for you.