DIY Method | How to Take Apart Xbox One Controller At Home
Learn how to disassemble Xbox One controller without the help of any professional at your own home and clean or repair joystick.
If you are a regular user of Xbox one gaming console but now Xbox One Controller is not working properly that means something is wrong. For this you can try to update firmware and check out some basic troubleshooting like battery change etc. If everything is ok then go for next to take apart an Xbox One controller.
Actually, disassembling the Xbox One controller is not a big task but Microsoft doesn’t recommend you open the Xbox One gaming controller at your own home. However, if you really want to take apart an Xbox One controller yourself, read all the advantages and disadvantages first. Otherwise, look for professionals to repair your Xbox controller.
So if you really wish to open Xbox One controller either to fix or clean the sticks, here’s how you can go about it quickly and easily.
Important Topics For Xbox One Users
- Reset Xbox One Password
- Clear Cache of Xbox One Gaming Console
- GameShare On Xbox One
- Connect Airpods On Xbox One Console
- Method to connect Bluetooth headphone on Xbox one
Here we are adding some fixes that are required at the time of taking apart your Xbox One controller. Additionally, check out the possible tips on what to do after you have opened the controller up.
Directional buttons not responsive Or Malfunctioning d-pad: Carefully pry up the tabs on the spring assembly so it pushes down with more force. Replace it if required.
Drifting analog sticks: Open the Xbox one controller and clean or replace the analog stick according to the requirements.
Inoperable audio jack: Verify that the jack is properly seated and making contact, and replace it if necessary.
Sticking buttons: Use canned air and other methods to remove gunk and other buildup after removing the circuit board assembly from the controller housing.
Tools For Taking Apart an Xbox One Controller
Before going to take apart and disassemble an Xbox One controller, choose the clean and clear workspace at your home. It will help you to prevent screws or other parts from falling on the floor or getting lost. After that, try to arrange some tools for disassembling your Xbox one controller. Otherwise, it’s not possible for you.
According to the Google search quarries, some users want to know “how to how to take apart xbox one controller without screwdriver” or “how to open xbox one controller without torx”. But believe me guys, don’t go for teardown of your Xbox one controller without having the proper tools.
- Screwdriver or T-8 safety Torx : If you are ready to tear down your Xbox One controller at your own home, use a Torx bit in a driver or use a dedicated Torx driver but it has to be a T-8 safety Torx. It’s because a regular T-8 Torx will not fit into the Xbox One controller screws.
- Prying tool : Use the professional paying tool or anything that is enough to fit inside the gap of the controller housing and the end covers. Alternatively, you can use the ATM card or visiting card or SIM card etc.
How to Take Apart an Xbox One Controller Without Help Of Professionals
Once you are ready with tools and other required arrangements, follow the below diy Xbox One Controller teardown process.
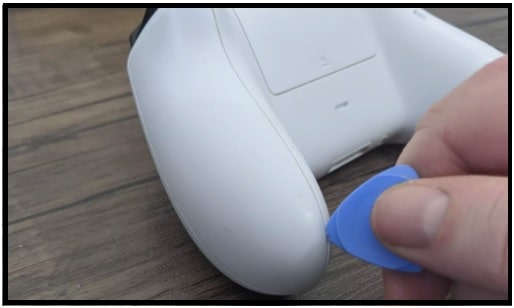
Step01 Remove The Panels
- First off all, take the praying tool in your hand, grab yourself a flat tool and try to separate the right or left grip cover very gently.
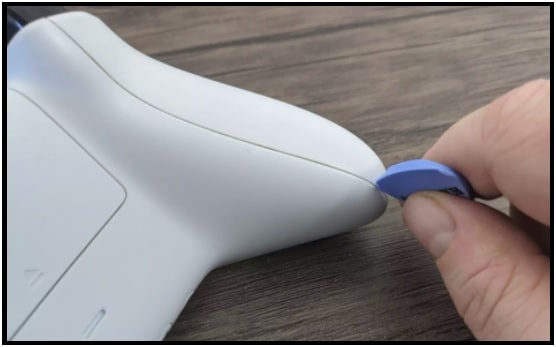
- Once the covers have started to separate, use your hand and try to separate them carefully.
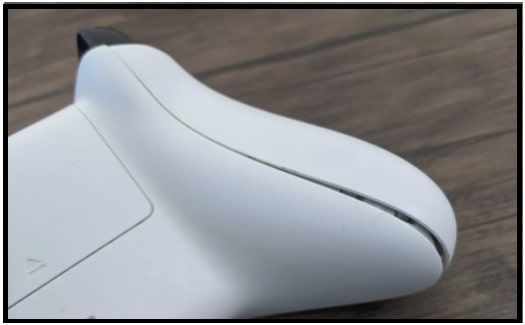
- Same as above, repeat the process with the other grip cover and open it with a praying tool.
- Next, open the battery cover.
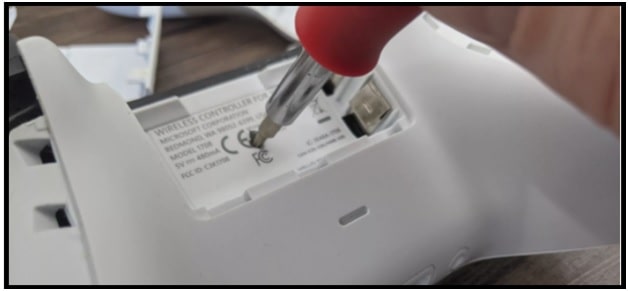
Step02 Remove The Screws Of Xbox One Controller
If your controller has never been taken apart, the sticker inside the battery compartment will be intact. You will need to push through the sticker with your Torx bit or cut it away to access the hidden screw.
- Unscrew the security screws : Now you will see 5 screws on the Xbox One Controller body. If you are unable to find the 5th screw, check the hidden screw inside the battery compartment. Remove all the 5 Torx Security Bit (TR8) screws with the Use a T-8 safety Torx bit.
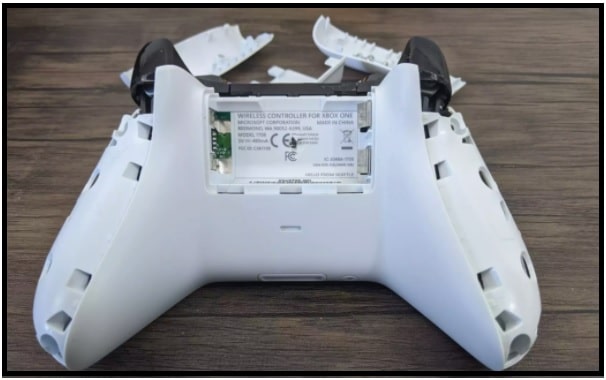
Step03 Remove The Face Plate And Back Cover Of Controllers
- After unscrewing all the screws, the controller will come apart. Turn your controller, give a little shake, tap all the screws out and lift out the face plate carefully [without force].
- Next, flip the controller again and remove the back plate. Just be careful that you don’t catch any wires.
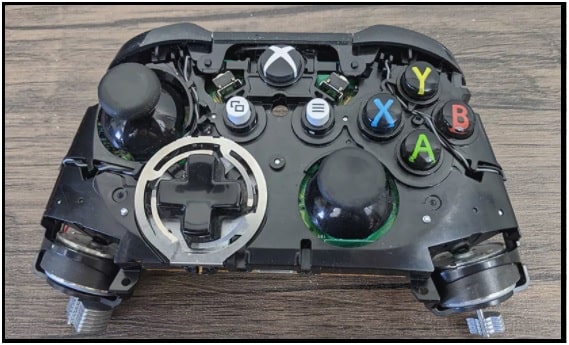
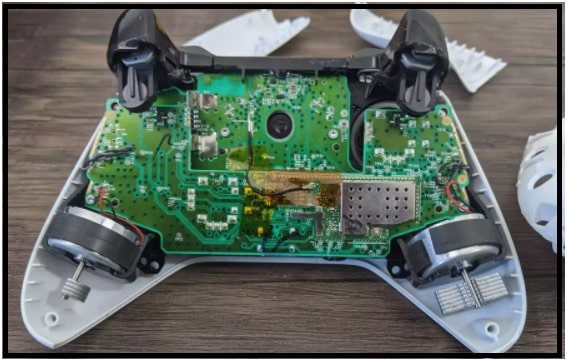
You now have access to the rumble motors, triggers, and some additional screws that you can leave alone unless you need to replace specific components on the circuit board. To access most of the other components, remove the assembly from the front case and flip it around.
- Now from the front side, you can clean the buttons, analog sticks, remove the analog sticks, remove the d-pad ring and d-pad, and more.
In this way we can easily take apart Xbox one controller for cleaning and repairing. Use the professional or normal screwdriver and follow the above steps very gently. To reassemble the controller, simply reverse all these steps again. Place the controller assembly back in the front case, close the rear case, tight again all screws and then cover the grip covers and battery cover back into place.
Dissembling the Xbox One controller with Torx screwdriver may be the best option because it’s really easy to use. But if the Torx screwdriver is not available at your home and still you need to fix the controller ASAP, use the normal screwdriver for the same purpose.
READ MORE : Watch Netflix On Nintendo Switch Gaming Console
As we can see “taking the Xbox One controller apart” is easy and any technical skill is not required. But you should do it with extra utmost care. Once you are able to open Xbox one controller panels, clean the circuit, fix the stuck joystick or the direction-pad, fix controller drift issue, paint it if you want, replace bummers or simply repair it