Windows 10 Remote Desktop Setup | How To Enable Remote Desktop In Windows 10
Windows 10 Remote Desktop Setup | How To Enable Remote Desktop In Windows 10
In today’s guide we are going to talk about Windows 10 remote desktop feature including its installation process. This windows remote desktop feature is also known as remote desktop protocol (RDP) that helps you to remotely connect and control other devices over the local network or internet. Mostly, this feature used to manage or control one pc to another pc to provide the online support.
Once the remote desktop connection is enabled on pc, you can easily access or control pc over the local network or internet.
Same as Windows remote desktop feature, several free and paid tools are also available to set up a remote connection such as Team Viewer and Chrome Remote desktop. Windows official remote desktop connection has some limitations. Because of this, third party remote connection services are useful to avoid platform compatibility. But if you are in a pure Windows environment, learn how to enable the built in RDP utility in Windows 10 PC/laptop?
- In order to setup RDP on your pc, you must have Windows 10 Pro or Enterprise installed. Windows 10 home addition doesn’t support this feature.
- To use remote desktop features, Remote Desktop should be enabled on the targeted or host computer.
- Remote Desktop App should be installed on the local device (client). Users can get it for free from the Microsoft Store, Google Play, and the Mac App Store.
- If you have an older version of Windows or a Windows IoT Enterprise client then download and install the Remote Desktop Client according to the system build. (Available for W 64 bit, W 32 bit, or Windows ARM64)
MORE ARTICLES
How To Allows Remote Connection Windows 10 / Windows 10 Pro
In this guide, we will share all necessary steps to allow remote desktop connection for windows 10 OS. For this, you need to configure the windows RDP (remote desktop protocol) by following the below instructions.
Step01 Enable Remote Desktop Connection Windows 10
All the supportable windows OS comes with a pre-installed RDP feature. But you need to enable it manually. By default, it is disabled because of security features. If you really need this, then go for next.
There are many ways available to turn ON windows Remote Desktop connection. Here we are two different methods. Choose the easiest one according to your own choice.
Method01 Enable Windows RDP From Settings
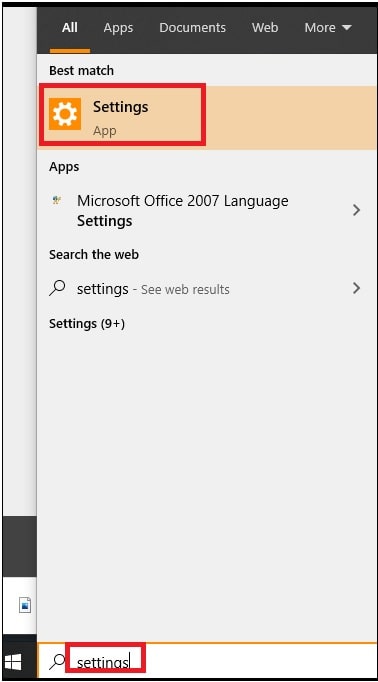
- Go to start >> search for “settings” and double click to open “Settings app”.
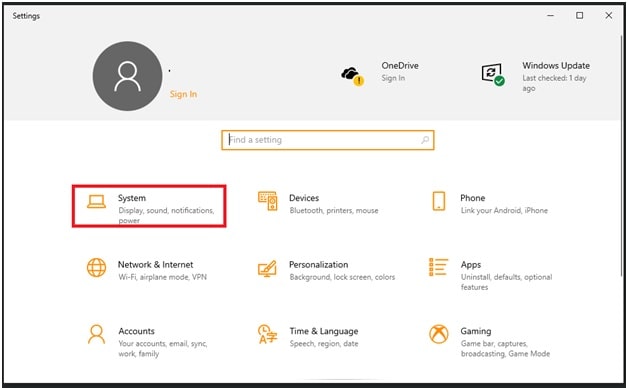
- Now click and open “System” from the settings section.
- Scroll down the screen >> click on “Remote Desktop” option and then enable Remote Desktop toggle switch to turn-On this feature.

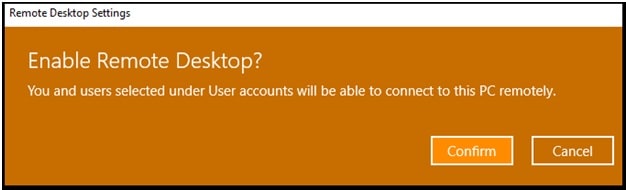
- Confirm your action by clicking on the “Confirm” button from the alert message.
- Done!!! Remote desktop enabled on your pc and now you can remotely manage or access this pc from any device after installation of a remote desktop client.
Method 02 Enable Or Turn ON Windows RDP Using Advanced System Settings
This is another alternative method to enable remote desktop w10 suggested by experts.
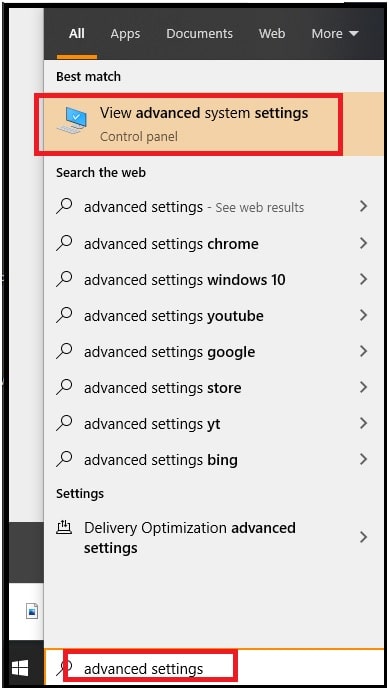
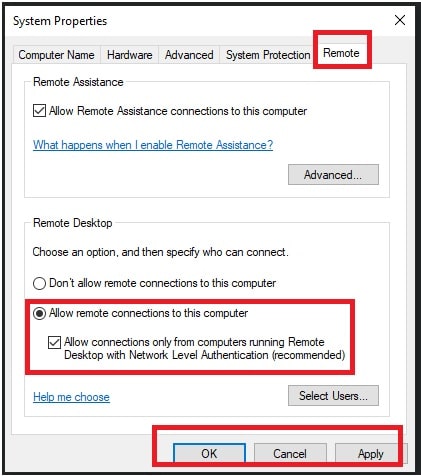
- Type and search “Advanced settings” >>> open the “Advanced System Settings” and it will open the “System Properties” window in front of you.
- Navigate to “Remote” tab >>> select the “allow remote connections to this computer” and then click “Apply” & “OK”.
- Done!!! Desktop Remote connection enabled for your pc.
Method 03 Enable Remote Desktop Via Control Panel
This is another easiest method for you. Here we can enable the RDP from the control panel of our pc.
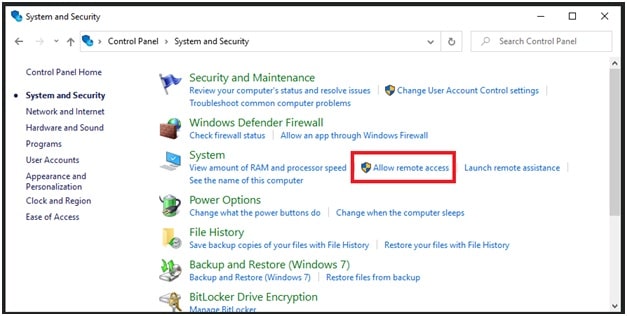
- Open “control Panel” >>> select “System And Security” option.

- Next, click on “Allow remote access” option. Find it under the “System” section.
- Now system property window will appear on your pc. Go to “Remote” tab >>> select the “allow remote connections to this computer” and then click “Apply” & “OK”.
- Done!!!
These are the easiest methods to allow remote desktop connection on windows 10 OS. Choose only one from the above three methods.
Step02 Install Remote Desktop App To Establish Remote Connection On W10
After enabling the remote desktop connections, now you also need to set up a remote desktop app on windows 10 pc. For this, you have a traditional desktop app or the Remote Desktop universal app.
Install Free Remote Desktop App windows 10
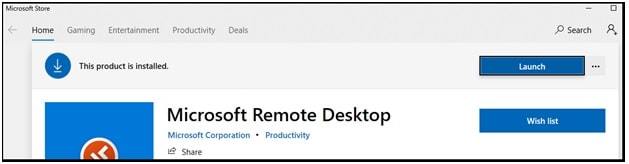
- Visit on the official link and download Microsoft Remote Desktop App. Don’t try to download it from any third party resources. Always use the official page.
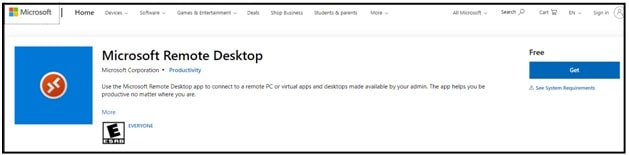
- Click on the “Get” button then click on the “Open Microsoft store” button from the new popup window.
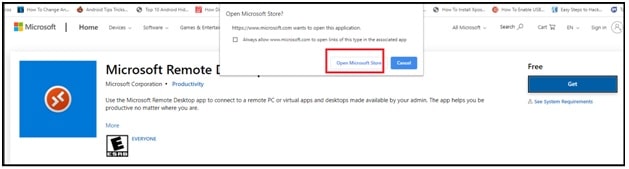
- Again click on the “Get” button and then sign-in to access Microsoft store. Otherwise, you can skip the sign-in step and it will download and install automatically.
- After completing the above steps, you can click on the “launch” button to open it on pc.
Please Note: If the app is not working properly then try to download the preview version of the app.
Remote app installation successfully completed. Now go for next to start remote Desktop connection.
Step03 Start RDP (Remote Connection Protocol)
Users can launch the remote desktop app from within the Microsoft Store or Start menu.
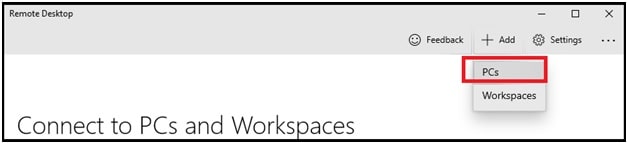
- Launch Remote desktop application on pc.
- Next, click on +Add button (add a pc or workspace) from the top right corner of the screen. Then select the “PCs” option.
- Now you need the required information to establish the secure remote desktop connection.
PC Name : Here you can add formal name or IP address. For this, specify the TCP/IP address of the computer you’re trying to connect to or enter the name of the host computer.
In case Of IP Address
- If the device is inside a private network, then enter the local IP address.
OR
- If the device is in a remote network (via the internet), enter the public IP address.
User Account : Add the “user Account” that you want to use for remote connection.
Display name: specify the account settings’ name.
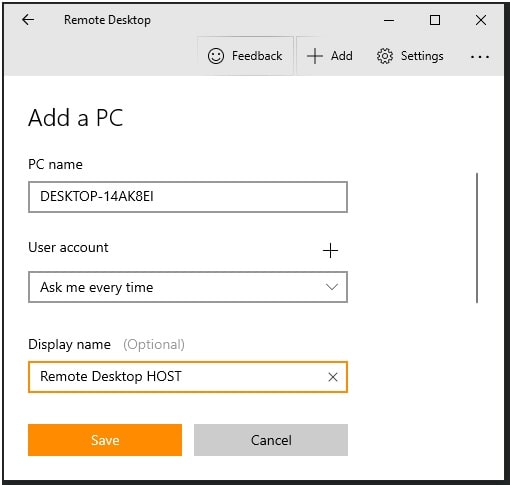
- After entering the correct information, just click on the “SAVE” button.
- Under the “Saved Desktop” section, click on the “PC” you just added before. You can identify it by display name.

- Now a security certificate screen will open in front of you. Select “Don’t ask about this certificate again” and then click “Connect anyway”.

- Enter the Password for the account you’re using >>> click the “Connect” button and it will start creating the new connection.

- Once you are ready with your host, you can see a black tab near the to-middle of the screen. Click on the three dots and choose “disconnect” or “Full screen”.

Step04 How To Use Remote Desktop Client To Access Windows 10 PC
Now follow the below steps to use Microsoft remote desktop connection windows 10 local network.
- Type “Remote desktop connection” in the search box and select the app.

- Now click on the “Show options” button to expend the “remote desktop client app” options.
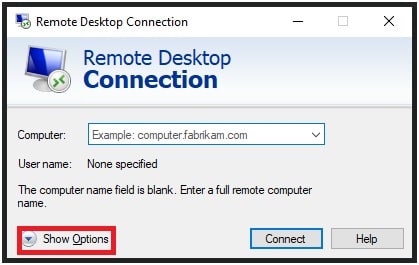
- Here you can see different tabs like General, Display, Local Resources, Experience, and Advanced. All these tabs are useful to customize your remote desktop connection according to your own requirements.
- Enter the name of the host computer under the “Computer” section.
- User name: required to make it easier to connect,
- You can also check the Allow me to save credentials (optional step).
- Select Save as to create a shortcut to connect more easily.
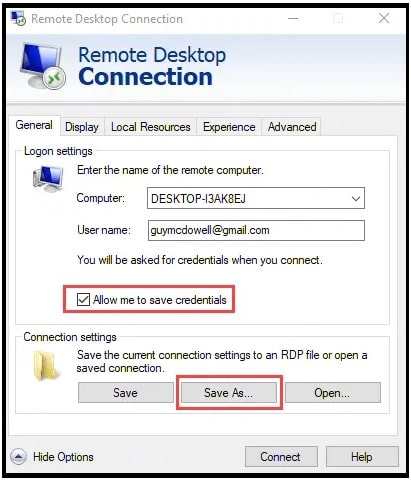
- Click on “Connect” to create a connection with the host computer.
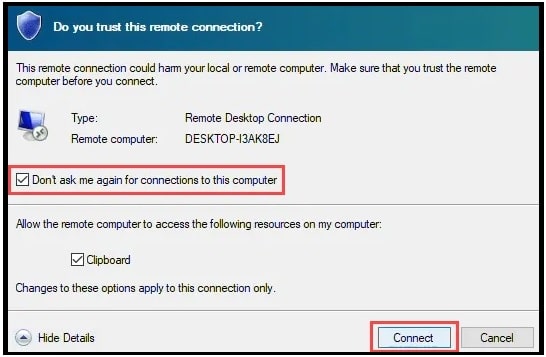
- Next, checkmark on the “Don’t ask about this certificate again” option and then click on the “connect” button.
- Wait for a minute to make a connection and then enter password under “Enter your credentials” section. These credentials will be used to connect to your pc.
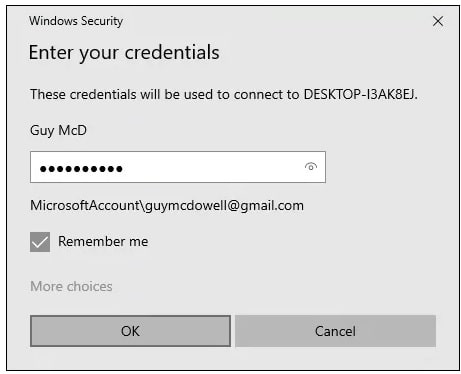
- Click “OK” and you are done.
What Can I Do With a Remote Desktop Connection?
Microsoft’s Remote desktop connection allows you to get files and any technical help with bridge connection. We can understand it with an example.
Probably, you may know that MSMdownload tool is an official firmware flashing tool for Oppo devices. This tool required the authorized username and password to access its feature. Just because it’s an online flashing tool, a technician can flash a device from another computer by using remote connection.
This is all about how to create remote desktop connections for windows 10 pc and laptop. Just enable remote connection feature on pc and then install remote desktop client application to access computer remotely. All the above steps are useful to setup remote connection on the local network.
Tips : Do you know Microsoft doesn’t allows you to send Ctrl + Alt + Del key command in remote desktop session. But we can do it with simple trick. Check out how to ctrl alt delete through a remote desktop?