How To Root Nexus 6P And Install TWRP Recovery [Best Method]
Nexus 6P has been launched in 2015 but now root files are available to Root Nexus 6P [Google Nexus 6P & Huawei Nexus 6p]. So if you are using Nexus 6P and now want to customise or modify your Nexus 6P then follow the tutorial and get root access on Google Nexus 6P safely. After getting root gain you can tweak your rooted Nexus in your own way.
Steps To Root Nexus 6P Safely
Here we can divide root process into three major steps.
[a] unlock bootloader in Nexus 6P
[b] Flash TWRP recovery on Nexus 6P
[c] Flash Supersu file to root Nexus 6P
Now follow all the below steps one by one and gain root access on Nexus 6P safely.
Step01 Pre-Requirements
[adb Folder Location – My Computer >> C Drive >> ADB FOLDER]- Download TWRP recovery Nexus 6P.
- SuperSu File For Nexus 6P [Root file for Nexus 6P]
- Download Modified Boot.img file
Step02 Enable USB Debugging & OEM Unlock
Usb debugging and OEM should be enabled on your device.
- Enable Developer Option – Go to phone “Setting” >> About Phone>> Tap 7 times on “Build ID”
- Enable USB Debugging – Go to “Setting” >> Developer option >> Bootloader Mode >> Enable USB debugging
- Enable OEM Unlock – Go to Setting >> bootloader Mode>> Enable OEM
Install TWRP Recovery On Nexus 6P
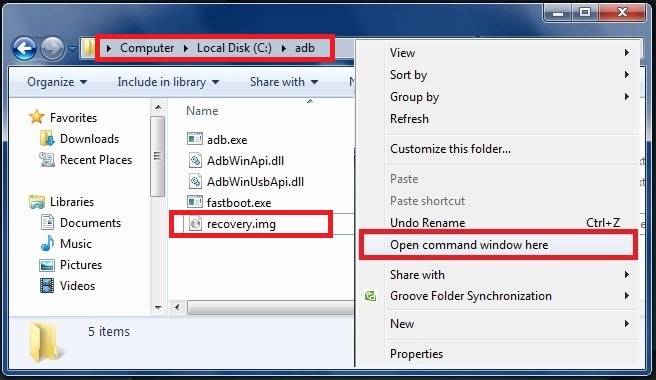
Step03 Now go the installation directory of adb and open “ADB Folder”.
[ADB folder location – My computer >> C Drive >> ADB folder]- Click on any blank space into the adb folder and then press & hold “Shift key + Right-click” from mouse and select “open command window here” option.
- Now a commend window will be open in front of you.
- Type the below command and hit enter.
[Command will show all attached devices]adb devices
- Now power off your device & boot Nexus into fastboot mode.
- Now connect Nexus 6P with pc via USB cable.
- Copy the downloaded boot.img file and TWRP recovery file and move them into the adb folder.

- Type the below command and hit enter button
fastboot flash boot boot.img
- Now again flash twrp recovery file by following command
[Replace filename with the file name of recovery image]fastboot flash recovery filename.img
- Use the volume keys for up and down movement and power key to select the Reboot Bootloader option. Once the phone has booted back into the bootloader you can use the volume keys to scroll and the power key to boot into your newly flashed recovery. It’s now safe to disconnect your usb cable.
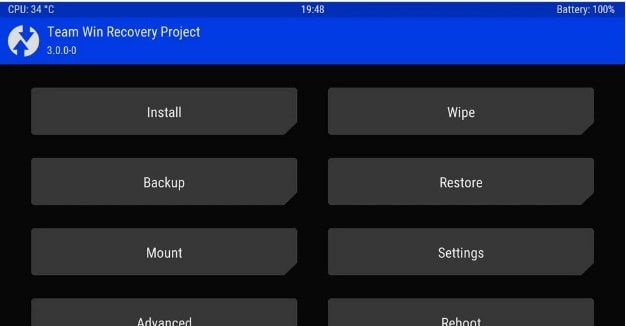
Root Nexus 6P By Using TWRP Recovery

- Boot Nexus 6P into new custom recovery [TWRP] and select “Wipe” menu and format.
- Now copy the downloaded Supersu root file and move it into the storage of your device.
- Now again go to main menu and select “Install” option.
- Browse the supersu root file, which you stored into the storage of your device. Just swipe to install supersu on the device.
- Here it will take few minutes to flash on your device.
- After flashing, click on “wipe cache/delvik” and then reboot system.

- All done!!! You have successfully rooted your Nexus 6P safely.
All Done!!! You have successfully rooted your Nexus 6P safely.
This is all about how to root Nexus 6P safely without any effort. Unlock bootloader in Nexus 6p and install TWRP recovery and then flash supersu file to root Nexus 6P [Huawei & Google].