(Speed Up Your PC) : How To Enable And Disable Windows Search In Windows 10
Learn How To Enable And Disable Windows Search In Windows 10
Without any doubt Windows 10 latest OS comes with lots interesting and useful features and built-in tools. Because of this many users already shifted on windows 10 OS for batter performance and speed. “Windows search” feature is one of them that makes it a more efficient desktop and laptop operating system.
With the help of windows search tool, users can search their documents, files, programs, emails, pictures and system files etc in much easier and quicker way.
By default, Windows 10 search tool or features comes as a pre-installed feature which is powered by Microsoft OS. Because of this feature, the files on the system will be indexed in a faster search speed.
But it’s also important to know that sometimes this windows search index tool may slow down the speed of your pc. We know, many of you really don’t know about this fact.
So, if you are facing slow performance or speed on your pc, disable windows search index feature manually to get better performance on w10. For example, disabling the windows search index tool is highly recommendable at the time of high disk usages error in windows 10 PC or laptop.
Actually, enabling or disabling Disable Windows Search in Windows 10 depends on your system configurations.
For example, if you have a good CPU and a standard hard drive then keep windows search indexing ON (enable). Otherwise, turn it off for lower configuration based systems. Additionally, any CPU with an SSD, turn Off indexing which is highly suggested for good performance.
When this feature is enabled, all searches are indexed so that searches are faster. At this time search index tool uses your CPU and RAM for quick performance. By turning it off, you can save those resources for other processes and it will boost the speed of your pc instantly.
READ MORE : Get The Best MP3 Rocket Alternatives
How To Disable Windows Search Indexing In Windows 10
As we already told you, disabling of windows search indexing is very useful to increase speed and performance of low configuration based systems. So, here we have two different options to disable search indexing for windows OS. Disable or stop windows search feature for selective files, folder, driver, outlook etc. Otherwise, completely disable the search indexing on windows 10.
Method 01 Turn-Off Windows Search Indexing In Windows 10 Completely
If your computer is not working properly or facing not responding error frequently or windows search not working then disable windows search service completely and save the important resources of your system.
Let’s see how to turn off indexing in windows 10 for better performance?
- Open “windows run dialog box” by pressing the “windows logo key + R” shortcut.

- Now type or paste the “services.mic” and click the “OK” to open “services (local)” section on w10.
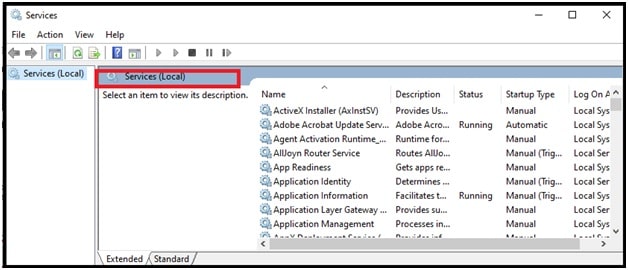
- Once you are into the “windows services” section, scroll down the screen and find the “windows search” from the list of services.
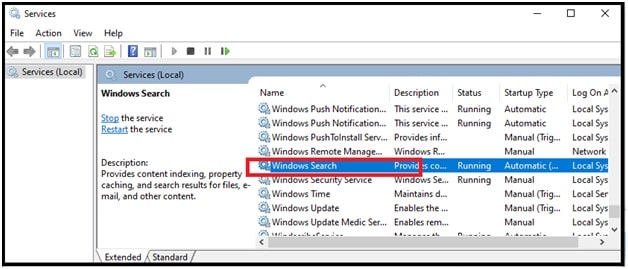
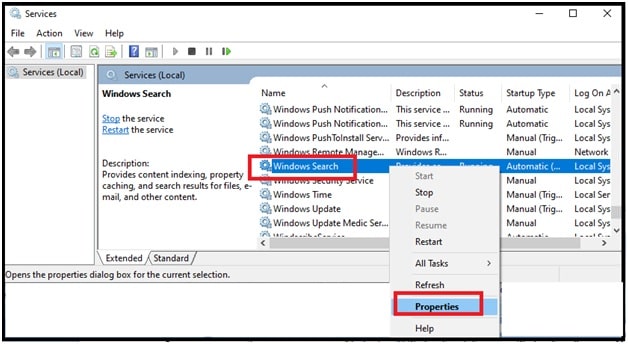
- Now double click on the “windows search” option and it will launch the “windows search properties (local)” window in front of you. Otherwise, right-click on “windows search” and select the “properties” option from the list.
- From the next window, click “Stop” to stop the Windows Search indexing service and then select the “disable” option from “drop down” section under the “Startup Type”.
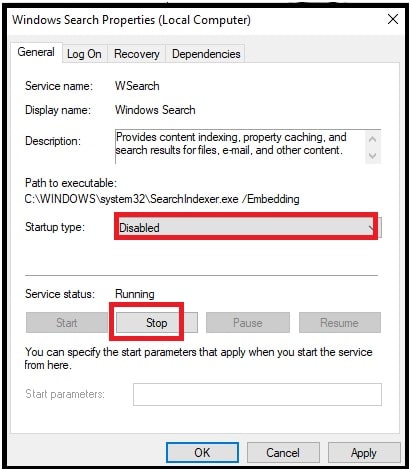
- Finally, click on “Apply” then hit the “oK” button and close all the opened windows.
- Done!!! Reboot your pc for once to apply the modifications on “windows service” features.
In next reboot, you will not see “windows search indexing” because it has been disabled completely. Don’t worry; you will not experience any negative impact after disabling windows search service in w10.
Method 02 Turn Off Windows Search Indexing Selectively
Selective way allows you to turn off windows search indexing for specific folder, drive and outlook etc. Choose the desired location and disable the indexing. It’s good about windows OS that it allows us to disable windows search service indexing for any specific folder. By using this method, you can enable search indexing for specific areas on your pc and disable it for others.
Actually, it’s the best way to preserve some amount of your precious resources. Follow the below process and trim down the number of files being indexed.
(A) Turn Off Windows Search Indexing For Specific Folder
Instead of disabling search indexing service completely, you are free to disable or stop specific folders of your system. In this way, users can preserve their CPU and RAM to use from the background process.
For this,
- Open the “Start Menu”, type “Indexing” and click the “indexing control panel options”.

- Now you will see the “Indexing options” window on your pc’s screen.
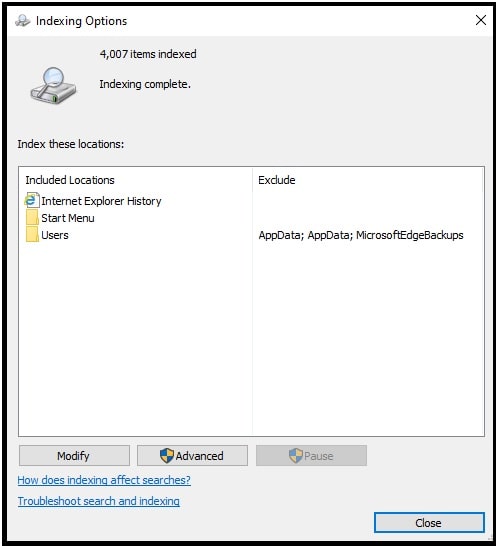
- In the new window, you will see all the “indexed” and “excluded” locations for indexing.

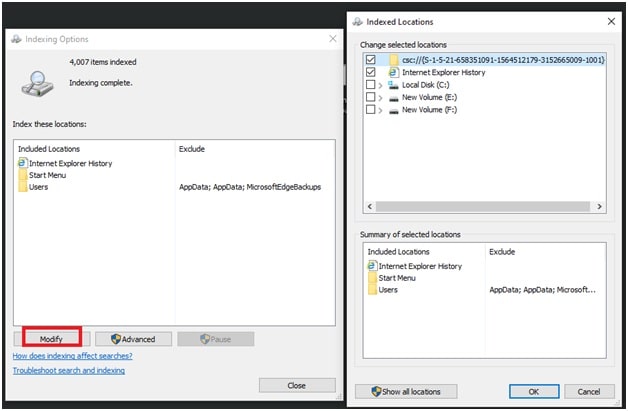
- Click on the “Modify” option and it will again open a new window (indexed Location).
- On the new window, come to the last section and single click on “User” option then uncheck the “User” option again.
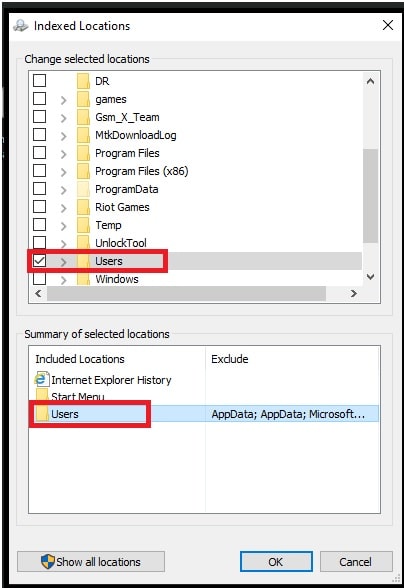
- You can take it further by clicking the drop down arrow on the Users folder and unticking individual folders.

(B) Turn Off Windows Search Indexing For Specific Drives
Same as a specific folder, we can also remove any specific hard drive of pc from indexing service. If you keep adding all the drives for indexing then the process will consume more and more resources. So, it’s better to switch off indexing for drives you rarely touch.
- Open “My Computer” or “this pc”.
- Right-click on the selected drive that you want to remove from windows search indexing and select the “properties” from the list.

- Next, uncheck “Allow files on this drive to have contents indexed in addition to file properties” option from the bottom section then click on “apply”.

- Now a new option window will appear in front of you. From here you can choose to apply the disabling for drive only or apply changes to drive :\, subfolder and file. Just choose the desired option and then click “OK”.

- All done!! On your next reboot, your pc will apply these new modifications for every file and folder on that hard disk/drive.
Above steps will disable windows search indexing for the selected hard disk of your pc. That means, now the system’s CPU and RAM will not take less effort. In short, speed and performance will increase automatically.
In order to re-enable indexing for specific drivers, open the properties again and then select the “Allow files on this drive to have contents indexed in addition to file properties” option again. This will turn on windows search indexing again.
Method 03 Turn On Or Off Windows Search Service Using CMD
In case, if you are feeling difficulties to enable and disable windows search service indexing using the above methods then here is another way for you. Windows 10 OS allows us to turn-On and Off this feature using command prompt which is a much easier process. Simply execute the correct command and it will enable or disable windows search instantly.
Turn-ON Windows Search Service Using CMD
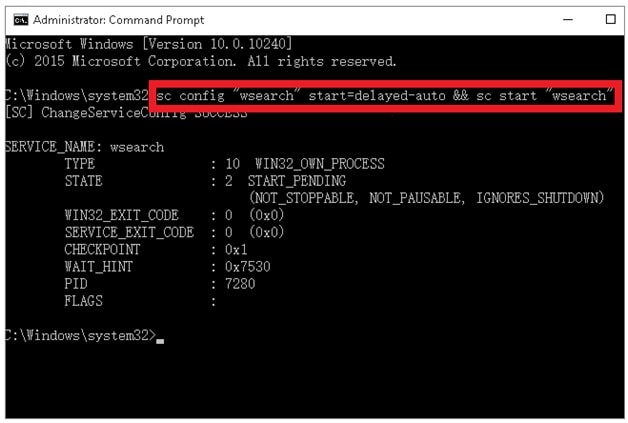
- Open command prompt on pc as administrator.
- Execute the below command correctly and it will enable windows search service automatically.
sc config “wsearch” start=delayed-auto && sc start “wsearch”
- Done!! Reboot your pc and check for changes.
Turn Off Windows Search Service Using CMD
Apply the below windows search service disable command to turn off windows search service.
- Run command prompt as administrator.
- Type or paste the below command and hit enter.
sc stop “wsearch” && sc config “wsearch” start=disabled

- Close the command prompt window and reboot your pc to apply the changes.
- In the next boot, your windows OS will stop the windows search feature permanently.
READ MORE : FN Key Not Working In Windows 10 Laptop And PC
These are the best ways to enable or disable windows search service indexing in windows 10 PC. Disabling this feature will never harm your computer. But it’s highly advisable to improve performance and speed of your pc. Simply disable the windows search indexing in desktop pc to save the resources (RAM & CPU). Sometimes, it’s also important to disable Windows 10 speed issues like “high Disk Usages”.