Methods To Get Classic Context Menu Back In Windows 11 OS
Recently we shared a detailed tutorial to get back classic start menu and start bar in windows 11. In today’s tutorial, we will learn “how to restore old context menu in windows 11 after upgrading new OS?”
Microsoft w11 OS comes with lots of interesting features and a brand new user interface. A modern context menu with a new interface is also one of them. Basically, it’s designed for a fast, smooth, and decluttered experience. But problem is that everyone is not happy with its new design. So, they want to experience older windows 10’s layout on the new Windows 11 OS. In the same way, some of them prefer the old-style context menu.
The good thing is that Microsoft allows users to add the windows 10 context menu back within a few simple steps.
How to Restore the Old Context Menu in Windows 11
By tweaking the w11 registry editor, we can bring back the windows 10 type context menu again. It’s an advanced method and one wrong step may crash your system. So, read all the instructions carefully and then apply them one by one.
For this – click search >>> type Regedit >>> right-click on ‘Computer’ in the left panel and select ‘Export’ >>> save the “registry backup” file on the desired location.
- Click the Search button >>> type Regedit.
- Select the Registry Editor app and open it.
- Once you are into the registry editor section, navigate to the following path:
Computer\HKEY_CURRENT_USER\SOFTWARE\CLASSES\CLSID.
- Right-click on the ‘CLSID’ folder from left-hand pane >>> select New > Key.
- A new key (folder) will be add under the “CLSID” folder. Now rename the new key as {86ca1aa0-34aa-4e8b-a509-50c905bae2a2}.
- Once again, right-click on the key that you created in the previous step and select New > Key to create a sub-key.
- This time, rename this sub-key as InprocServer32.
- Now you will see a registry key named ‘Default’ inside the InprocServer32 key. Double-click the Default key under InprocServer32.
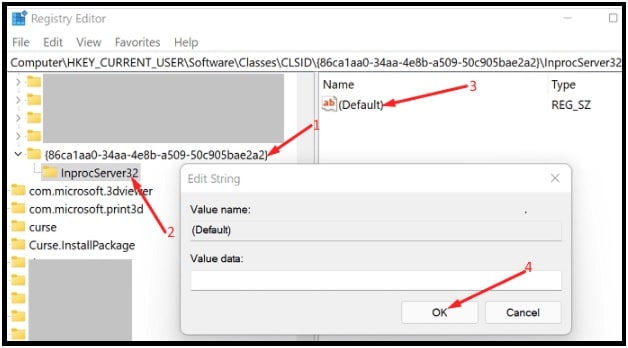
- This time you not need to change anything (make sure the ‘Value data’ field is blank). Just close the Default key without editing anything.
- Close the Registry Editor section and reboot your w11 pc to apply the modifications.
Now it’s the testing time.
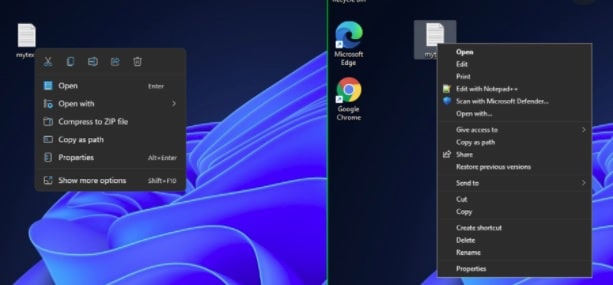
Before doing this, you need to restart your computer to apply the changes. Otherwise, changes will not display on your screen. Right-click on desktop, the classic Windows 10 context menu will be visible on the screen if you followed all the instructions correctly.
How To Bring Back Windows 11 Context Menu In Again
Just enter into the “Register editor” >>> find the newly created key {86ca1aa0-34aa-4e8b-a509-50c905bae2a2} and delete it >>> reboot your system
This is all about “how to get old right-click context menu on w11 by editing the registry editor?” modification in the registry editor is the only possible way to restore windows 10 type context menu in windows 11 OS> Just create the two keys {86ca1aa0-34aa-4e8b-a509-50c905bae2a2} and InprocServer32 and restart your pc to apply the modification. That’s it.