How To Install TWRP On Xiaomi Mi A2 And Root Mi A2 Safely
Install TWRP On Xiaomi Mi A2 And Root Mi A2 Safely
Once again we are here with another root guide and today we are talking about Xiaomi Mi A2 Root including twrp Recovery. Recently Xiaomi launched it’s another new android One based Android Mi A2 Oreo 8.1 Smartphone. As we all know Mi A1 was the first Android One mobile from Xiaomi and now Mi A2 is brand new updated version of Mi A1 mobile.
Without any doubt, latest MI A2 android smartphone is powerful and high specification rich android device for all Xiaomi lovers. But till now, if you are not satisfied with it’s ROMs features or want to experience full potential of the device then rooting can do it for you. Simply get root access on Xiaomi Mi A2 mobile and start different customization & modifications on it. Moreover, users can change or spoof device ID, imei of mi A2 for different android tricks & tweaks.
So now the question is that “how to install twrp recovery on Mi A2?” and “how to root Xiaomi Mi A2 Oreo Phone safely?”
If you are owner of Xiaomi Mi A2 android mobile and seriously want to root Mi A2 Oreo then you have to read the complete post carefully. In this tutorial, we will show you the complete step by step procedure to root Mi A2 android One Mobile. But remember, one wrong step may brick the device permanently. So do it carefully with your own risk.
Xiaomi Mi A2 TWRP Recovery Download
Download TWRP For Mi A2 according the Mi A2 variant.
- Xiaomi Mi A2 TWRP Recovery : TWRP-3.2.3-jasmine-20180804.img / Mirror Link
- Xiaomi Mi A2 Lite TWRP Recovery: Not Available
Guide To Root Mi A2 Android One Mobile [Unlock Bootloader/TWRP/Root]
Please Note: In case, you are here to root Mi A2 without pc then you should know that till now there is no any direct method is available to root Mi A2 without computer/pc.
In order to root Mi A2 phone, you have to unlock bootloader first. Same as other devices, Xiaomi MI A2 also come with locked bootloader and it’s should be unlocked to apply any modification on the device. After that install custom TWRP recover on Mi A2 to flash Magisk Root file for root access.
TO make it easier, we are splitting the complete Mi A2 root procedure in three major steps….
[A] Unlock Bootloader Of Mi A2 [B] Flash TWRP Recovery On MI A2 [C] Flash Magisk & Root Mi A2[A] Unlock Bootloader Of Mi A2
As we already told you, bootloader must be your first step before going to apply any customization on the device like TWRP flashing and Magisk Flashing etc.
Because Mi A2 smartphone is a Android One based device, it comes without any MIUI skin and Mi ROms. So no need to use Mi flash unlock tool to unlock bootloader of Mi A2. User can unlock or reloack bootloader of Mi a2 withing single fastboot command. Check below guide.
[B] Flash TWRP Recovery On MI A2
Once you have bootloader unlocked mi A2 in your hand, you are free to flash custom recovery on Mi A2 mobile. TWRP recovery flashing will replace stock recovery with custom twrp which is necessary to flash root files. Default stock recovery can’t flash these types of third party zip files. So twrp recovery must be install on Xiaomi Mi A2 before rooting.
Steps To Install TWRP On Xiaomi Mi A2 Android One
- Make sure bootloader of Mi A2 unlocked before going to jump into next step.
- Download Mi a2 TWRP, Root File & DM Verify Disabler Files………………
TWRP Recovery For Mi A2 From Above Download Section
Root File For Mi A2 : Magisk zip file [v16.7] Or SuperSu zip file [GUIDE]
DM Verify Disabler: no-verity-opt-encrypt-6.0.zip [It’s important, if you are not going to root the device just after twrp recovery installation]
- Now connect the device with pc via USB cable and transfer all files [TWRP, Root file & DM Verify disabler file] into phone storage or sd card.
- Come to the device and Enable USB debugging, OEM Unlock & Disable Automatic System Update
Go to Phone “Setting”>>> “Developer option”>> Enable USB Debugging, OEM Unlock & Disable Automatic System Update

- Download and Install “Minimal adb & Fastboot tool” on pc by following guide.
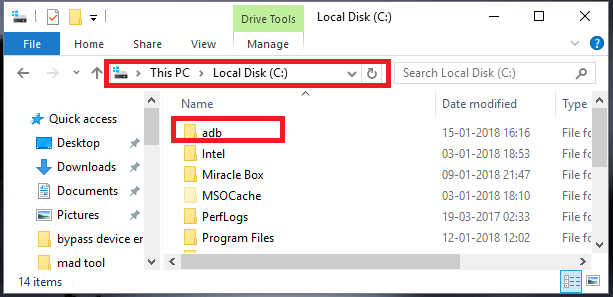
- Now copy the twrp recovery file and transfer it into adb folder location. [My Computer >> C Drive >> ADB Folder]
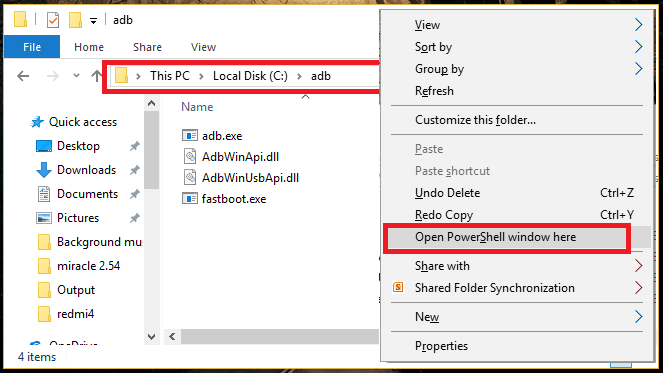
- Now press & Hold “Shift” key + “Right” click + select “open command window here” or “open powershell window here” option as shown below.
It will open a new command window on pc. Don’t close it. We will use it in next step.
- Run the below command and boot Mi a2 into fastboot mode automatically.
adb reboot bootloader
Otherwise, you may boot device into fastboot mode manually.
Power off >> Press & Hold Volume Down key + power key together at the same time.

- Find Active Partition Of Mi A2: before going to next step, it’s must to check active partition of the device. Mi A2 has A/B partition and it may differ per users. That means, active partition may be A or B. Just identify the active partition of the device, because you have to flash twrp on non-active partition.
For this purpose, run the below command and find out the correct active partition of MI A2.
fastboot getvar current-slot
- Now note down or remember active partition of your own MI A2 device.
Important: If active partition is “A” then you have to install twrp recovery on non-active partition “B”. In case, active partition is “B” then flash twrp recovery on non-active partition “A”. I think it’s clear now.
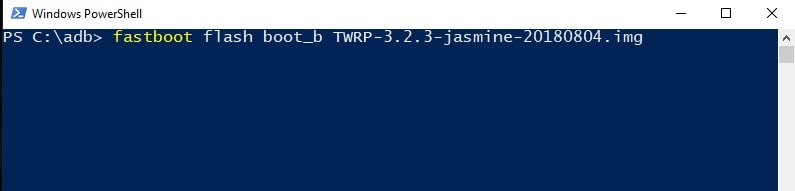
- Open command window again and run the below command to flash/install twrp recovery on non-active partition “B”. because we are assuming “A” is active partition.
fastboot flash boot_b <name of twrp file here>.img
Replace the <name of twrp file here> with twrp recovery name.
For example: fastboot flash boot_b TWRP-3.2.3-jasmine-20180804.img
- Now set the non-active partition (B, in our case) as the active partition by executing the below command.
fastboot set_active b
- Important!!! Hold the volume up key and run the below command to reboot into recovery mode to access twrp first before starting android os.
fastboot reboot[Basically fastboot reboot command used to rebooting device into normal mode from fastboot mode. But by holding volume up key + fastboot reboot will boot device into twrp recovery. So do it carefully]
- Here it may ask you to enter PIN or pattern lock, if you were using any screen lock on the device. Just enter security lock to continue the process.
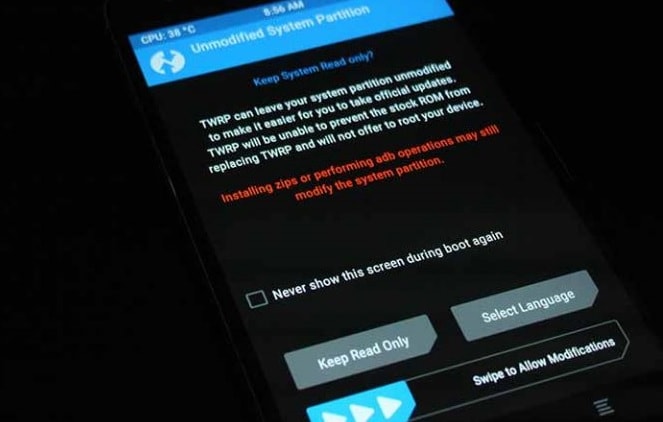
- At first boot, it will ask you to select “keep Read Only” option or “Swipe to allow modification”. Just select “Keep Read Only” option and don’t allow system modification.
- This time you should be into TWRP main menu.
- Click on “Install” and browse “DM Verify Disabler zip file” from storage and flash it. [This step is must, in case you are not going to root your device just after twrp recovery flashing. Without flashing DM Verify Disabler zip file, device may stuck into bootloop or may stuck on Mi Logo.
- Done!!! TWRP recovery installed on Mi A2 and you are free to root Mi A2 by flashing Magisk root file.
Here we recommend you to root Mi A2 just after flashing twrp recovery.
[C] Flash Magisk & Xiaomi Root Mi A2
Here we are using latest Magisk v16.7 for Mi A2 rooting, user may use Supersu zip file also. [Guide to root any android using SuperSu zip file]
- Go to main menu of TWRP recovery, click on “Install” option, browse the “Magisk.zip file” and flash it from next screen. It will take couple of minutes to flash and device will root automatically.
- Switch The Active Partition: After twrp recovery flashing or Rooting process, it’s the time to set the original active partition. In our case, we assumed “A” is active partition and we installed twrp recovery in non-active partition “B”. So we have to activate the partition “A” again.
For this purpose, Press the home menu in TWRP recovery and Reboot >> Activate Slot A
- Reboot now and device will reboot again into normal mode with full root access including TWRP recovery.
For root status, download any root checker app from Google Play store and confirm the MI A2 root status. If everything is ok, it should be rooted.
This is all about to root Xiaomi Mi A2 Android One with twrp recovery installation. TWRP recovery flashing is little bit different from older method but working and tested by XDA developer. So no need to worry about it’s stability.
Till now getting any issue in any step or have any quarry regarding the post please leave your comment below.