How To Automatically Empty The Recycle Bin W10 : Recycle Bin Cleanup
Learn How To Automatically Empty The Recycle Bin W10 : Recycle Bin Cleanup
We all know the requirements and uses of “Recycle Bin” in Windows OS. When we delete any file (text, photo, video, etc) from our pc, we are not actually removing that file from our computer. It’s only moving from the pc drive to the recycle bin folder. After that we can recover it again or can remove them permanently.
Just because all the deleted files get moved to the recycle bin folder, it continuously uses valuable space of our hard drive. In that case, we may face low disk space due to these unwanted deleted files. To avoid this issue, we can easily empty recycle bin manually to free up the storage occupied by these files. But sometimes, you often forget to do such a simple task.
Because of this Microsoft Windows OS introduced a new feature with the latest versions. If you keep forgetting to empty the recycle bin on w10 pc or laptop, we can set a schedule for the Recycle Bin to delete all the trashed files automatically.
After enabling the automatic empty recycle bin feature in windows 10, there is no need to open up the recycle bin and empty it again and again.
In this guide we will show you all the steps to automatically empty the Recycle Bin folder using the Task Scheduler to keep the hard drive space optimized.
It’s also important to know that previous windows OS comes with a feature to limit the storage amount that the recycling bin can use. In short, users can set a particular disk space for their recycle bin. But the problem is that you need to clear recycle bin every once in a while.
But now we can schedule deletion of files from the recycle bin which is completely automatic and we no need to do anything manually. With the windows 10 OS, users can automatically empty the recycle bin to avoid wasting space. If you don’t know how to do that then this guide may help you.
Latest Windows 10 version comes with a storage sense feature that is designed to automate drive maintenance including emptying the Recycle Bin automatically.
Automatically Empty The Recycle Bin In Windows 10
In our previous post, we teach you “how to enable or disable delete confirmation dialog box in w10” to delete files without a confirmation screen. Read more about that if you want to learn more about it.
However, Windows OS allows users to delete files from their pc without moving them to the recycle bin. But it’s not recommended because sometimes the user ends up deleting something important accidently. In that scenario, the recycle bin is important because users can restore them again from the recycle bin.
In this guide we will show you both methods. So that now you can apply the best method according to your own choice.
Method 01 Automatically Empty the Recycle Bin on schedule
(A) Automatically Delete Recycle Bin on Windows 10 1809 or below
- Press & hold the “Windows logo Key + X” and choose “Settings” from the list. Otherwise, Press the “Windows key + I” to open the “settings” section directly.
- Next, click on “System” from the available options.
- Find the “Storage” tab in the left pane of the “System settings” window and click on it.
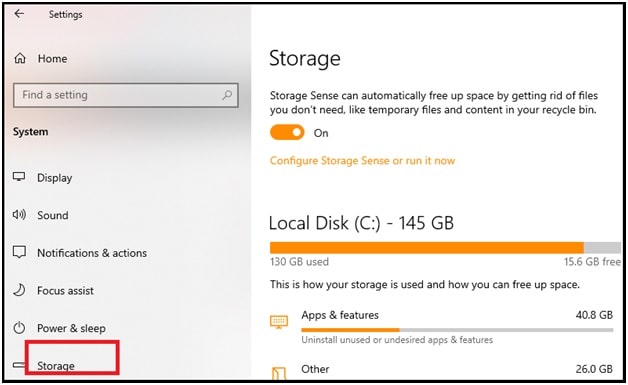
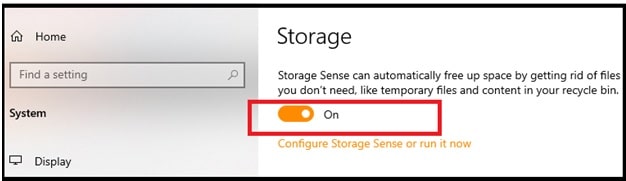
- In the right pane, scroll down a bit and enable the “Storage Sense” (Enable the toggle for it).
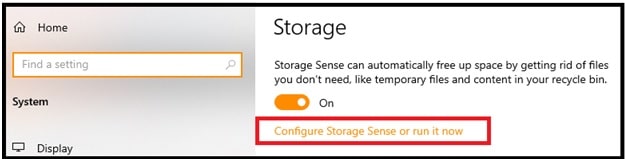
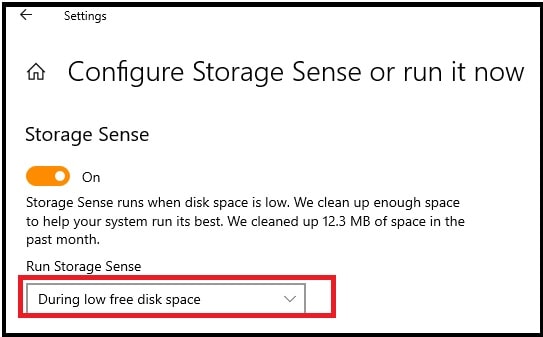
- Now click on “Configure Storage Sense or run it now.” Link.
- Under the “Storage sense” section, choose how often you want to run storage sense tool. Here you can choose from “Every Day” to “every week” to “Every Month” or “only when disk space is low”.
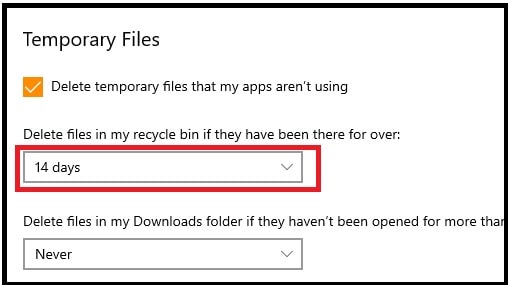
- Same as above, under the “temporary files” section, you will see the “Delete files in my recycle bin if they have been there for over” option. Under the Recycle Bin, click the drop-down menu select the number of days you want a file to keep in your recycle bin folder. Here you can choose from every day to up to every 60 days.
IMPORTANT: If you are choosing the “Never” option, it will disable the feature.
- All done!!! Automatic recycle bin clean up feature configured successfully and now you can close all the windows.
(B) Automatically Clear The Recycle Bin W10 1903
If you try to check, Microsoft changed things in the storage sense section for the Windows 10 1903 May 2019 update.
- Same as above, open the “Settings” >>> “System” >> select the “Storage” option.
- Next, turn on the “Storage Sense” (if already not enabled) >>> then click the “Configure Storage Sense or run it now” link.
- Now scroll down under the “Temporary Files” section and choose how often it automatically deletes files in the Recycle Bin.
- Done!!!
In this way we can start automatic recycle clean up to remove deleted files from the recycle bin automatically. Just configure the “windows storage sense” tool according to your own choice and leave everything on automatic process. This feature is really very helpful to keep your disk cleaned up without thinking about it. But remember, you can’t recover these files after removing them from recycle bin.
Method02 Automatically Clean the Recycle Bin on schedule Using Task Scheduler
- Open “Start” >> search for “Task Scheduler” and open it.
- Now right click on the “Task Scheduler Library” and select the “New Folder” from the list.
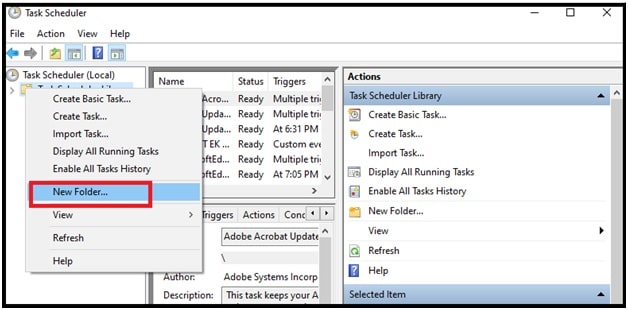
- Type the name of the folder as “My task” or anything. (You want to do this to keep your tasks organized and separated from the system tasks.)
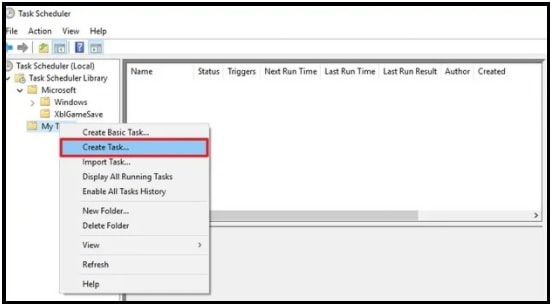
- Next, right-click on the newly created folder and select “Create task”.
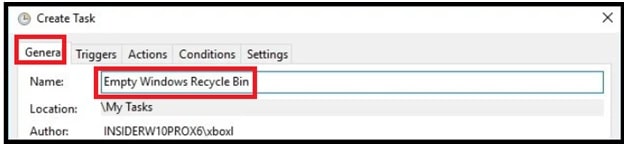
- Under the “Create Task” window, go to “General” tab >>> enter the name of the task. Example – Empty Windows Recycle Bin or automatic clean up recycle bin.
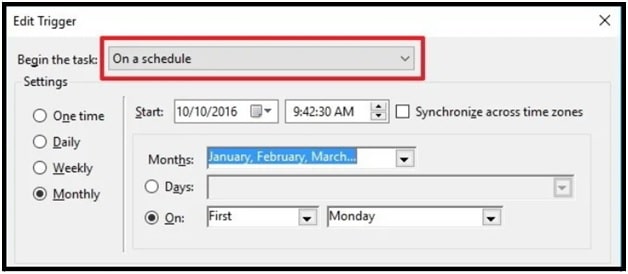
- Again go to “Triggers” tab, click the “New” button from the bottom to create an action that will trigger the task.

- Here you can see multiple functions like “on a schedule” or At log on or At startup or On an event and more.
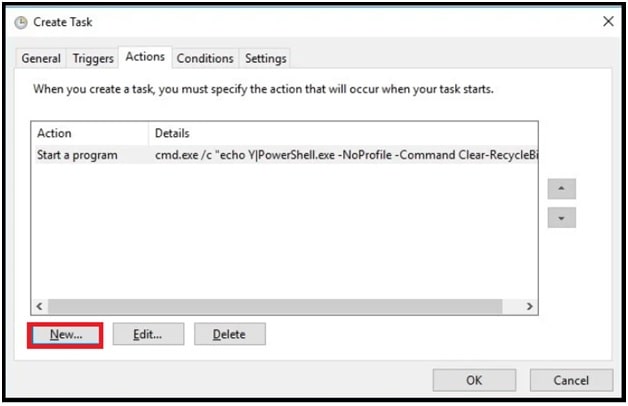
- Again go to “Action” tab and click on the “new” button.
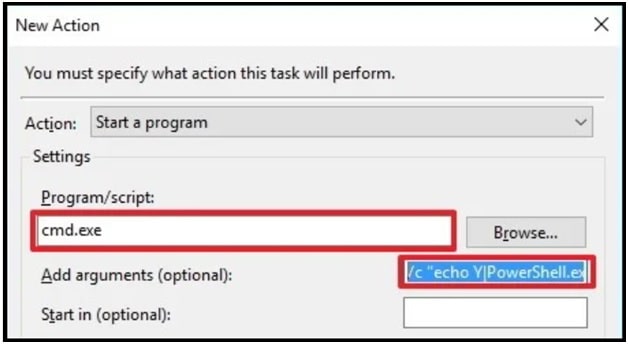
- Now configure the tool.
Under the “Settings” section, locate the Programs/script and type the cmd.exe.
Same as above, under “Settings” section, Find the “Add arguments (optional) and enter the following argument and click OK
/c "echo Y|PowerShell.exe -NoProfile -Command Clear-RecycleBin"
- Finally click OK to complete your task. All done!!
Trigger condition applied successfully. Now the process will start and run automatically according to your own configuration.
Method 03 Delete Files Without Moving To Recycle Bin Windows 10
As we already told you, windows 10 OS allows us to remove all the files without moving them into the recycle bin folder. Mostly this feature is helpful for those who are using low storage drives on pc. With the help of the recycle bin, we can restore files again. But after applying the below method, there is no way to recover them again. After enabling the direct deleting feature, the tool will remove the deleted files without moving them into the recycle bin.
- Simply, right-click on the “Recycle Bin” on the desktop.
- Select the “Properties” option from the list and it will open the “Recycle bin properties” window in front of you.
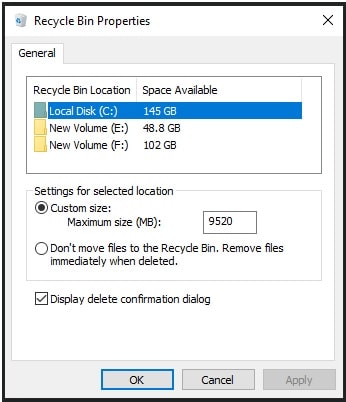
- In the newly opened window, you will see a list of drives of your pc. Select the drive and then choose the option “Don’t move files to the Recycle Bin. Remove files immediately when deleted”.

- Click on “Apply” then “OK” to save the changes.
- Now repeat this process for all your drives that are displayed in this list.
- Finally, click on Ok.
Now, if you delete any file from any drive it will be permanently deleted from the system. That means, you will not see your deleted files in the recycle bin folder. So you no need to clear your recycle bin again and again. It will always stay empty.
Please Note : Empty recycle bin on startup your pc is also available. But it will not give you a chance of recovery. Because of this it’s not recommended to enable clean recycle bin on startup windows 10.
why is my recycle bin empty in windows 10
Ans. If you are not able to see your deleted files in the recycle bin folder that means, automatic schedule clean up recycle bin enabled or maybe you have enabled the direct deleting feature in w10. Because of this, windows OS is removing the deleted files without moving them into the recycle bin. For this disable the “storage sense” feature first. After that change the settings from the recycle bin properties.
These are the perfect and quick solutions to set your recycle bin to automatically empty. After making the correct changes in your windows pc, the recycle bin automatically deletes the files without a manual action.
If you have any doubt or quarry about this tutorial, please comment below.