Twrp Root Samsung A7 SM-A750G / SM-A750GN Android 10 Q | How To Root galaxy A7 (2018)
Twrp Root Samsung A7 SM-A750G & SM-A750GN Android 10 Q | How To Root galaxy A7 (2018)
Are you using latest Galaxy A7 (2018} model [SM-A750G / SM-A750GN / A750F] and want to root it? If yes then this guide is for you. But before rooting your device please read the below discussion and then go for next.
Rooting is an advance android customization technique. So you should know all about its advantages and disadvantages. Moreover, you must have a strong reason of root access.
If you are going to root your Galaxy SM-A750G / SM-A750GN, because everyone is doing the same then you are on wrong track. Similarly, it’s only for flashing a new custom ROM then believe me guys official Samsung One UI is more stable and optimize to perform batter. No nay third party custom ROM is well optimized in comparison of Stock ROM. As a result, these third party apps and ROMs can be a reason of bugs, software crash, bootloop, battery draining etc.
READ MORE : Samsung Good Lock APK 2020
That’s why we never suggest you to root your device for simple modification and customization. But if you are facing no service or no network on Samsung A7 (2018) because of invalid IMEI then root is must. Samsung IMEI tool can’t flash or write new imei without rooting your device. We can consider it in strong reason.
It’s actually just an example to check requirements of rooting. Now it’s the time to ask yourself that why you want toot root SM-A750G / SM-A750GN Samsung A7 or why you want to install TWRP on Galaxy A7?
If you have correct or necessary then read the guide, download Samsung A7 root file and apply the rooting procedure.
Rooting any device is not a big task but It’s a advance technique and we have to change the system file of the device. So, one wrong step may brick our device permanently. Second important thing is, make sure you are going to use correct and supportable files on compatible android version and models.
Unsupported files flashing can be cause of soft brick or hard brick.
Testing Device Model : SM-A750F / 750G / A750GN
Android Version : Android Q 10
UI Version : One UI 2.0
Download Samsung a7 SM-A750G / SM-A750GN TWRP + Root File + Tool
Samsung galaxy A7 2018 SM-A750G SM-A750GN Android 10 Q TWRP and Root package zip file.rar
ODIN Tool[ All Versions ]
Magisk File [ All versions ]
Steps To Root Samsung A7 (2018) Android Q Including TWRP Recovery
Now we will see how to install twrp recovery on Galaxy A7 A750F/ A750GN & A750G model. After that we can flash magisk root package to get full root access on Galaxy A7 (2018) android Q mobile. This time method is little bit different from traditional TWRP recovery flashing. Before flashing twrp using ODIN tool we need to flash modified patched boot image file. So download TWRP recovery file for Samsung A7 (2018) with root file and follow the steps one by one.
Step01 Setup Root File, TWRP And Tool Configuration
- Turn ON Wifi connection on your device. [ Settings >>> Connections and enter wifi password. ]
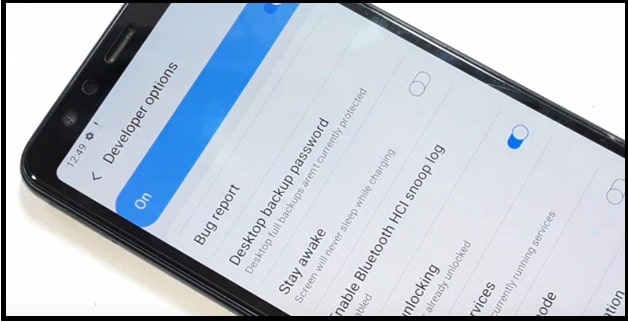
- Enable USB Debugging & OEM Unlock
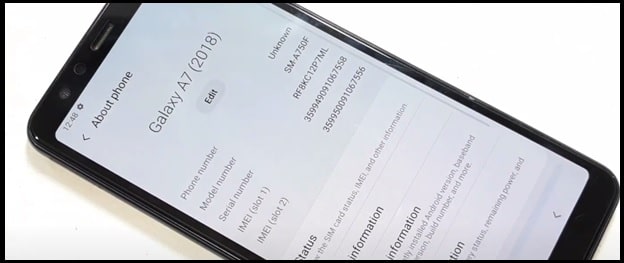
“Settings” >>> “About Phone” >>> “Software information” >>> Tap 7-10 times on “Build Number” to open developer options
Enter into “Developer Option” >>> enable USB Debugging and OEM Unlock
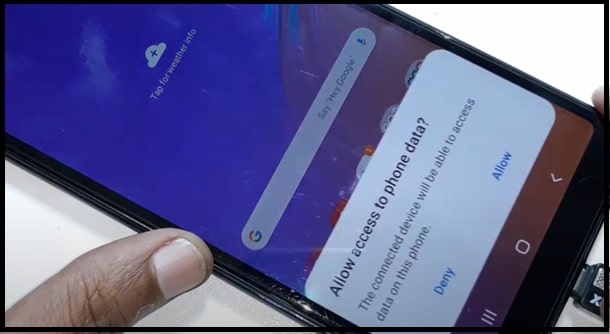
- Connect the device with pc via working USB cable and “allows access to phone data” by clicking on “Allow” option.
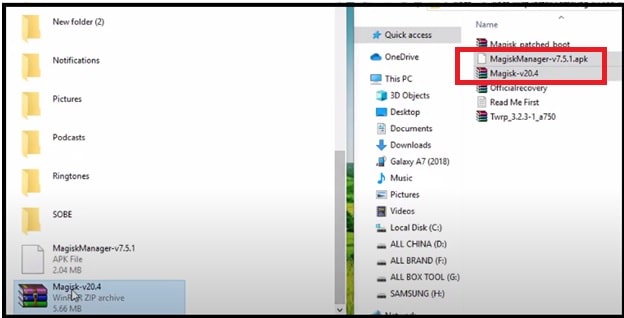
- Extract the downloaded “Samsung galaxy TWRP and Root package zip file” on pc and move the “magisk zip file” & “magisk Manager apk” into SD card/external memory card.
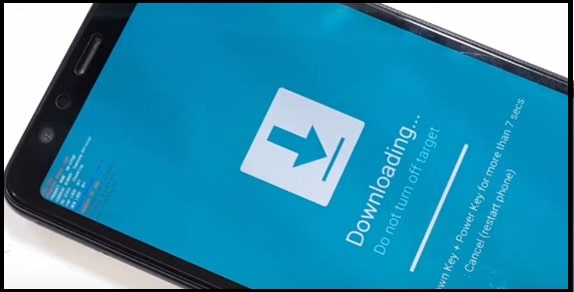
Step02 Boot Samsung Galaxy A7 (2018) into Downloading mode.
- Power off the device and press & hold volume up and Down key together + insert USB cable
- Now you will see a warning message on phone screen.
- Press volume up key for once and device will into Odin mode / Downloading mode automatically.
Tips : In case mobile hardware keys are not working then use Samsung downloading mode tool.
Step03 Flash Boot Image & TWRP using ODIN Tool
In order to flash twrp recovery on Samsung galaxy a7 (2018), we need to flash special patched.img file. After that we can install custom TWRP recovery using ODIn tool.
Flash Patched Boot Image On Samsung Galaxy A7 {2018}
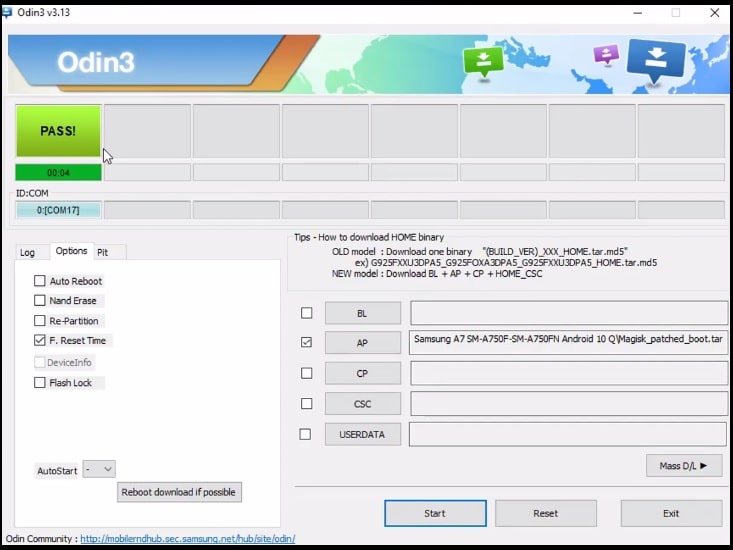
- Run odin tool as administrator.
- Once the tool launched, click on “Options” tab and untick “Auto Reboot” option. [ This step will stop auto reboot after flashing patched boot image file]

- Now click on “AP” button and browse the “Magisk_patched_boot.tar” file from extracted root package folder.
- Hit on “Start” button to flash patched boot image file on Samsung galaxy A7 (2018) using ODIN tool.
- End of the successful flashing, tool will show “Passed” green message on the tool log window.
Important : Don’t try to reboot your device into android OS. Otherwise, you will stuck in bootloop. So reboot the device into downloading mode again without booting it into normal mode.
Flash TWRP Recovery On Galaxy A7 using odin Tool
- Continue press & hold volume down key + power key.
- Again you will see the “Warning message”. Press volume up key for once to boot device into “Downloading mode”.
- Use the same “ODIN tool”. Otherwise, close and relaunch it again.
- Uncheck “Auto Reboot” from “option” tab as shown below.
- Click on “AP button” and load “Twrp_3.2.3-1_a750.tar” file from root package folder. Hit on start button and it flash twrp recovery on Galaxy A7 (2018) mobile.
- End of the successful twrp recovery flashing, you will see “pass” message as shown in above screenshot. That means, twrp recovery flashed on Samsung A7 SM-A750G / SM-A750GN Android 10 Q using odin tool.
Step04 Root Galaxy A7 (2018) using Magisk Root File
- Boot device into TWRP recovery : This step is very important. So do it carefully.
- Press & hold volume down key + power key at the same time.
- Release the volume down key after vibrate and then quickly hold the volume up key including power key. It will boot device into recovery mode directly from downloading mode.
- Once you are into twrp recovery, tap on “WIPE” option >> “Format Data” >>> type “Yes” to clean mobile data.

- Go back to main menu again >>. Tap on “install” >>> “Select storage” >> “Micro SD Card” >> browse magisk zip file >>Swipe to confirm flash.
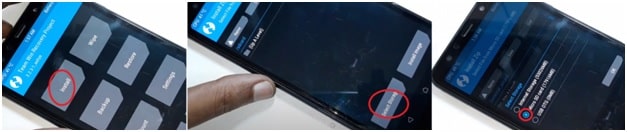
- Once the zip file installed on mobile, select “Reboot System”. In case, if you don’t want to install custom recover permanently then come back to main menu >> select “Reboot” >> “Download” >> “Do not install”.

- Done!!! Reboot device again and check app drawer of your device. This time you will see “magisk manager app”. That means, device have full root access.
Samsung FRP Tools
FRP Hijacker Tool For Samsung phones
These are simple steps to root Samsung Galaxy A7 SM-A750G, SM-A750F & SM-A750GN using magisk and odin tool. Just download all the root required files, flash the modified boot.img file to make it supportable with latest TWRP recovery. After that, flash Magisk latest root package to get root access.
Process is very simple and 100% working tested with both SM-A750G / SM-A750GN / SM-A750F models.