How To Root Redmi Note 8 | Install TWRP Safely
How To Root Redmi Note 8 | Install TWRP Safely
Are you a Redmi Note 8 android Smartphone user and now want to flash TWRP recovery on Redmi Note 8 to get root access? If yes then you have landed on right place. Here in this guide we will show you “how to install TWRP recovery on Redmi Note 8 and root Redmi Note 8 without dead risk?”
Recently Xiaomi launched it’s brand new model “Redmi Note 8” with android pie [ MIUI 10 ] powered mobile with some excusive features. This time Redmi Note 8 is a 6.3 inch in size which is good for big display lovers. Moreover, Xiaomi added latest and powerful Octa-core (4×2.0 GHz Kryo 260 Gold & 4×1.8 GHz Kryo 260 Silver) CPU with Qualcomm SDM665 Snapdragon 665 (11 nm) chipset.
Dual SIM support, fingerprint sensor, huge internal space, external memory support, accelerometer, gyro, proximity and compass are enough to make it powerful android device.
But we all know these are not enough for advance android user and always they want something more. Basically Xiaomi or any other mobile companies never allows user to modify their device officially. So rooting is the perfect solution, if you want to apply android tricks and tweaks. After getting full root access, users can apply any customization over the stock features.
Now come to the point. If you really want to root Redmi Note 8 MIUI 11 or MIUI 10 then we are here for you. Simply download Redmi Note 8 twrp recovery, root files and follow the Redmi Note 8 root procedure. It’s very simple to gain root access on Redmi Note 8 MIUI 10 / MIUI 11. But remember one single wrong step may brick your device permanently. So do it carefully on your own risk.
READ MORE : Working GCAM For Redmi Note 8 / Note 8 Pro Without Root
Important Points Before Root Redmi Note 8 MIUI 10 / MIUI 11
In order to root Redmi Note 8 android pie mobile, you have to flash custom TWRP recovery on Redmi Note 8 mobile. Once you have twrp recovery on your device, you are free to flash root package on the device.
But main thing is that very first you have to unlock bootloader of Redmi Note 8 with Xiaomi Mi unlock tool. Doesn’t worry it’s an official method to unlock bootloader of any Xiaomi device including Redmi Note 8 MIUI 10 mobile. You can also relock the bootloader again to revert back the phone warranty. But till now there is no any method to root Redmi Note 8 without unlock bootloader.
How To Install TWRP Recovery And Root Redmi Note 8
Now we are going to start Redmi Note 8 root process. So read the post carefully, learn everything and then apply it on your own device. Complete root process will wipe all user data and phone data of the device. So, we recommend you to take backup of the device like messages, contacts, photos, video and custom settings.
Pre-Requirements To Root And Flash Redmi Note 8
- Take full backup of the device to avoid data loss.
- Charge the device approx 80% to prevent accidental power off in between root process.
- Working USB cable and windows OS based pc / laptop.
- Download and Install “minimal adb & fastboot tool” on pc.
- Download “Android Platform tools” to run fastboot commends.
- Magisk Root Package Zip file for root. [ magisk-v20.1.zip ]
- Unlock Bootloader on Redmi Note 8 mobile.
Download TWRP Recovery For Redmi Note 8
Custom TWRP Recovery For Redmi Note 8 Download / MIRROR
Here we are splitting the complete Redmi Note 8 root guide into three steps for easy to understand. Just follow the steps and root your latest Redmi note 8 android pie 9.0 mobile.
Step01 Unlock Bootloder Of Redmi Note 8
Step02 Flash Custom TWRP Recovery On Redmi Note 8
Step 03 Flash Root File Using Twrp Recovery
Step01 Unlock Bootloder Of Redmi Note 8
As we already told you, any modification is not possible without unlocking bootloader. So check below official method and unlock bootloader of Redmi Note 8 mobile. After that you are ready to flash twrp and root files.
Step 02 Flash Custom TWRP Recovery On Redmi Note 8
Once you have bootloader unlocked Redmi Note 8 mobile in your hand, follow the below steps and install twrp recovery. Few fastboot commands are enough to flash TWRP on Redmi Note 8 phone.
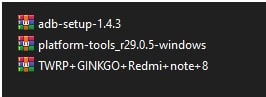
- Download and unzip all files in one folder on pc. [ TWRP, minimal adb &fastboot tool, Android fastboot platform tool ]
- Now follow the below guide and install “Minimal adb & fastboot tool” on windows pc to install fastboot drivers on pc. [ must ]
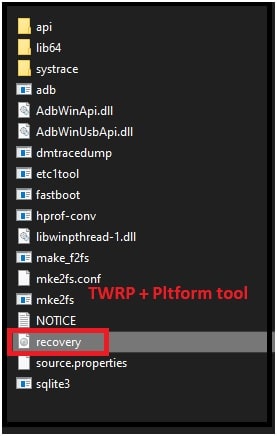
- Now copy and move TWRP recovery file into “Android Platform Tools” folder. Make sure the ADB Fastboot Drivers are installed on your PC. In short, twrp recovery image file and platform tool files should be in one folder. [ Don’t forget to rename the name of downloaded twrp as recovery.img ]
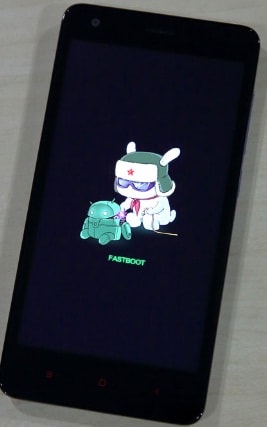
- Boot Redmi Note 8 Into Fastboot mode manually.
- Once the device into fastboot mode, connect it with pc via working USB cable. Leave it as it is and don’t unplug USB cable.
- Again enter into “Android Platform tools” folder >>> press & hold “Shift” key + Righ mouse click >> select “open powershell window here” or “open command window here” option.

- By following the above step, a new command window will appear in front of you.
- Type the below fastboot commend to check, if device is properly connected or not?
fastboot devices


- Next type the below fastboot command again to flash twrp recovery automatically.
fastboot flash recovery recovery.img


- TWRP will flash within few second. Now press and hold volume up key + power key together at the same time. It will boot device directly into newly installed twrp recovery.
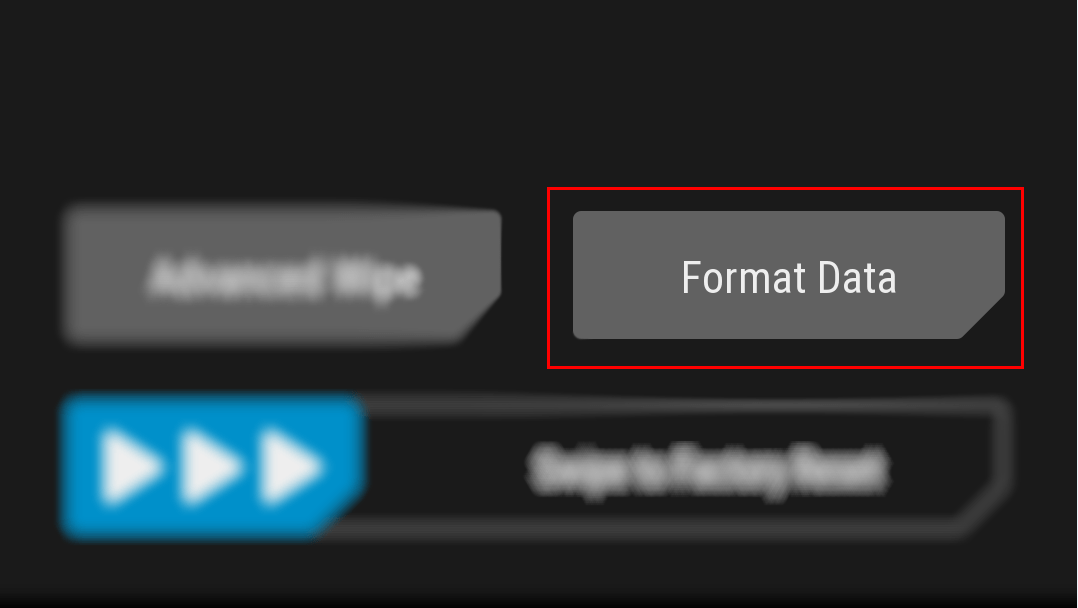
- Fix Decryption Issue In redmi Note 8 – Once you are into newly installed twrp recovery, navigate to “Wipe” option >> select “Format Data” >> then type “yes” to confirm formatting.
This step is very important to fix Decryption issue in redmi Note mobile. In some twrp internal storage of the device is not writable neither recognized. Just format data and it will fix this issue.
- Done!!! Latest TWRp recovery installed on Redmi Note 8 without error.
TWRP recovery installation process completed. But if you want to root Redmi note 8, follow the nest step.
Step03 Flash Root File Using Twrp Recovery
This is our final step to root Redmi note 8. After applying the below step, you will get full root access on your device.
- Download the latest Magissk root zip file and save it on your pc.
- Connect the device with pc via USB cable and move Magisk root zip file into phone storage.
- Boot device into TWRP recovery again [press & hold volume up key + power key together]. Skip the step if device is already into twrp recovery.
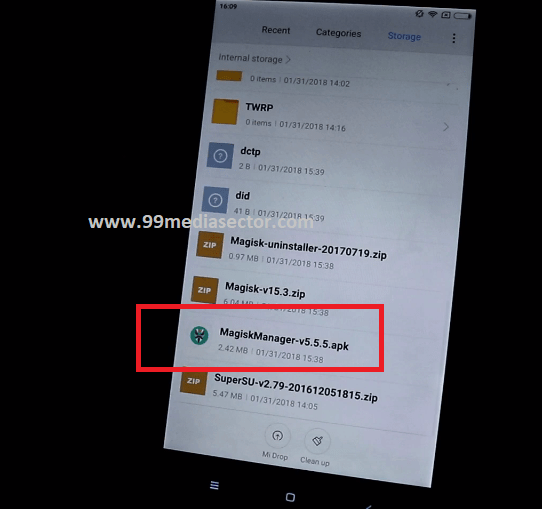
- Tap on “Install” button from main menu of TWRP recovery and browse Magisk zip file.

- Now “swipe to confirm flash” to start flashing process. Here it will take few minutes only.

- After flashing the zip file, come back to main menu, choose “Reboot” then choose “System“.
- Device will reboot into normal mode. Check device application drawer and find the Magisk Manager app. If it’s there that device is rooted successfully.
- Done!!!
These are simple steps to install custom TWRP recovery on Redmi Note 8 and root device. All the files and methods are 100% working and tested. So you can also use them without any issue.