Easy Steps -How To Add Vintage Style To Images In Blogger?
Have you see vintage style hover effect on images. It’s really cool and impressive trick to display your blogger posts images. Whenever your visitor will hover on image it will convert in vintage style. To add vintage instagram effect on your blogger images you don’t need to use any rocket science or any software. You can do it by adding CSS code in blogger template.today i will show you how to add vintage style to images in blogger by adding simple CSS in your blogger.read complete tutorial and apply on your blog.
By adding this tricks on your blog image will look like this.
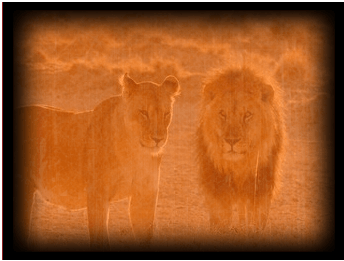
Visit on our demo site and see how beautiful it will look in your site.
Note: This trick will not work on internet explorer (older version) .so try to test it on other browser.
Add Vintage Style On Blogger Images
Step 01
Before starting choose an image which you want to add on you post and get a link by uploading it on http://postimage.org/
Upload image and grab the URL .we will use it again in the end of post.
Step 02
- Login to blogger website.
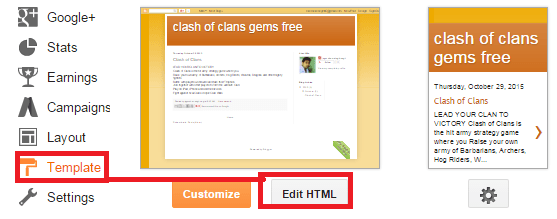
- Navigate to template option and click on it.
- Now click on Edit HTMLA HTML editor window will be open in front of you.
- Click anywhere into HTML editor window and search </head> tag by CTRL+F and press enter.
- Now copy the below code and press just above the </head> tag.
Code Is Here
<style>
.vintage img {
padding:0;
float:left;
}
.vintage {
border:10px solid #000;
position: relative;
float: left; /* Change to right if you want the images to be aligned to the right */
margin-right: 20px;
margin-bottom: 20px;
}
.vintage:before {
content: “”;
display: block;
position: absolute;
top: 0;
bottom: 0;
left: 0;
right: 0;
background-color: rgba(255,102,0, 0.6); /* sepia */
background-image:url(https://2.bp.blogspot.com/-Qva8IVtO25k/UFejhDww-zI/AAAAAAAADAY/RnlCb7JO0xs/s000/grunge.png);
background-size: cover;
box-shadow: inset 0 0 50px #000, inset 0 0 50px #000, inset 0 0 50px #000;
-moz-transition: all 1s;
-webkit-transition: all 1s;
-o-transition: all 1s;
transition: all .1s;
}
.vintage:hover:before {
background: none;
box-shadow:none;
-moz-transition: all 1s;
-webkit-transition: all 1s;
-o-transition: all 1s;
transition: all .1s;
}
</style>
- Now Click on Save Template button.
Step 03
- Now create new post and switch to HTML tab as shown in below screenshot.
![]()
- Now copy the below code and pate it in HTML tab.
Code Is Here
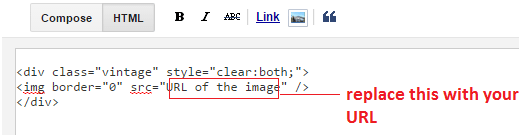
<div class=”vintage” style=”clear:both;”>
<img border=”0″ src=”URL of the image” />
</div>
- Replace the text “URL of the image” with your own image URL which you grab in Step 01 (starting of the post).
That’s it.now you can see vintage style on your blog post image.you have to repeat Step01 and step 02 for each post whenever you want to add vintage style to images in blogger.now its your turn to apply this beautiful tricks on your blogger images to turn them in a vintage look and surprise your visitors and readers.