How to Root Samsung Galaxy J2 SM J200F Safely [100% Working]
If you want to root Samsung Galaxy J2 SM J200F 5.1.1 lollipop version then you are on right place to know how to root Samsung galaxy j2 safely.we can asure you its a 100% working ,safe and tested method to root your Samsung j2. before rooting your Samsung device you have to know that twrp recovery should be installed on your device.
Samsung galaxy j2 is one of the best selling budget android phone in India who prefer to use Samsung android devices.Samsung galaxy j2 was released in April 2016 with lollipop 5.1.1 android version.but now you can upgrade it into Marshmallow version.you can do it manually.if you think your phone is junked with lots of unwanted third party apps or they are consuming your phone battery ,precious internal storage and RAM then rooting is one of the best method to get ride on these problems.
Samsung Galaxy J2 UAE SM-J200F 5.1.1 Lollipop
Samsung Galaxy J2 SM-J200F Turkey 5.1.1 Lollipop and other Regions.
Root Samsung Galaxy J2 SM J200F 5.1.1 Lollipop Version
Basically there are two major steps to root Samsung galaxy j2
- First Install TWRP recovery on Samsung Galaxy J2.
- Second Flash supersu file by using TWRP recovery.
Now lets start the process to root samsung galaxy j2 SM-J200F lollipop android version.
Step 01 Pre-Requirements
- Take backup of your phone data like message,contacts,photos & videos.
- Charge your phone aprox 60%
- Data cable or USB cable to connect your phone with pc.
Step02 Download and setup
- Download Samsung USB drivers & install it on your pc.
- Download Latest ODIN pc tool for pc.
- Download TWRP recovery file to install TWRP recovery on samsung galaxy j2 Sm-J200F 5.1.1 Lollipop version .
- Download Supersu file and place it on phone storage.
Step 03 Enable USB Debugging & OEM unlock
- To enable developer option go to your phone setting>> About phone.
- Tab on build number option for 7 times .now you will get the message “you are now a developer”.
- Go back again and enter into the “developer”
- Now find the “USB debugging” option and enable it.
- Same as you will see the “OEM” option then enable it.
- Make sure you don’t have factory reset protection enabled in your Google Account otherwise you may never be able to boot again.
Step 04 Boot Samsung Galaxy j2 Into Downloading Mode
- Switch off your phone first.
- Now press & hold Power+Volume Down +Home key together.
- Here you will see a warning message on screen.
- Press Volume Up key for once.
- Now you will be into “Downloading Mode” option.
Step 05
Install TWRP Recovery On Samsung Galaxy J2 SM-J200F
Click here to read full detail post to install twrp recovery on samsung galaxy j2.
- Make sure samsung USB drivers are installed on pc.
- Make sure USB debugging is already enabled on your phone.
- Make sure your pone is into downloading mode.
- Now copy the downloaded TWRP recovery file and place it on pc.
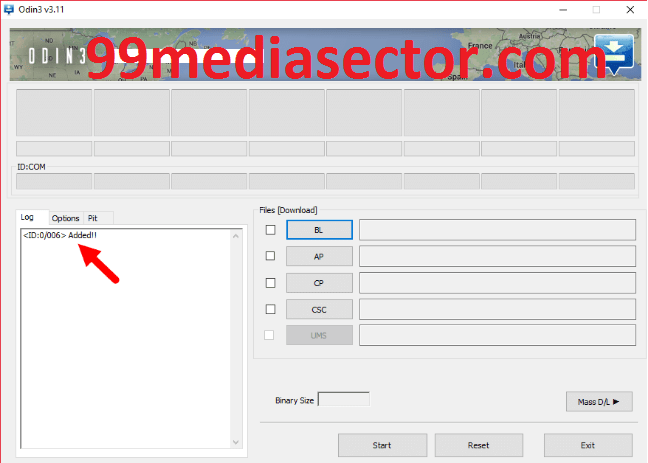
- Now open the download ODIN on your pc and run the ODIN exe file.
- Now again connect your phone with pc via USB cable.[Phone should be into downloading Mode]
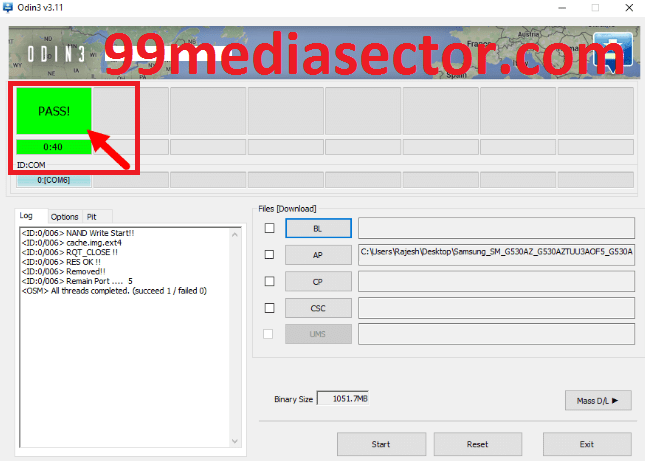
- Now you will see the message “ID:COM:” in odin that means phone is connected properly and you are ready for next step.
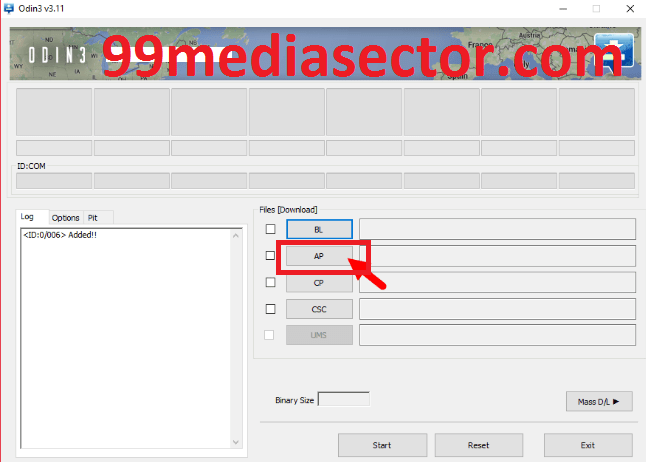
- Click on “AP” or “PDA” option and browse the TWRP recovery file.
- Now click on “START” button and run the process.
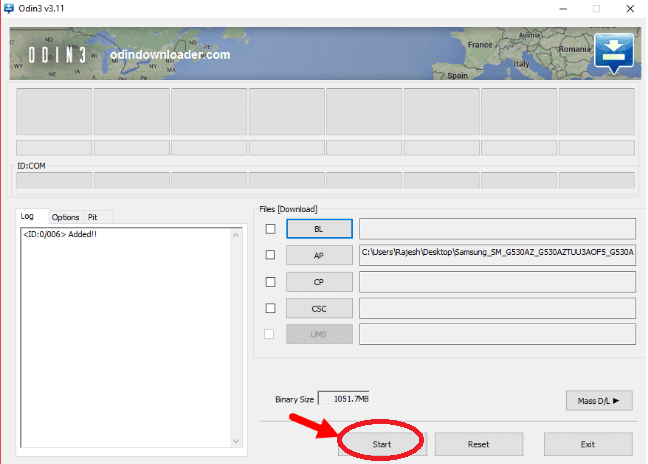
- If everything is OK then you will see a green “PASS” message on odin. That means TWRP recovery has been installed on your phone.
Now phone will reboot into twrp recovery automatically. If not then you can check TWRP recovery is properly installed or not by entering into recovery mode manually. Just power off >>Press & hold Volume Up+Home+Power key together and boot into recovery mode.
Step 06
Flash SuperSu File To Root Samsung J2 SM J200F
After installation of twrp recovery now you are ready to flash supersu file to root your device.now follow the steps one by one.
- Now Download SuperSu File and move it into your phone memory.
- Now disconnect your phone with pc and switch off it properly.
- Now press & hold Volume up+Home+Power key together and boot your phone into recovery mode.
- Select Wipe->Advance Wipe->Select Cache Data.
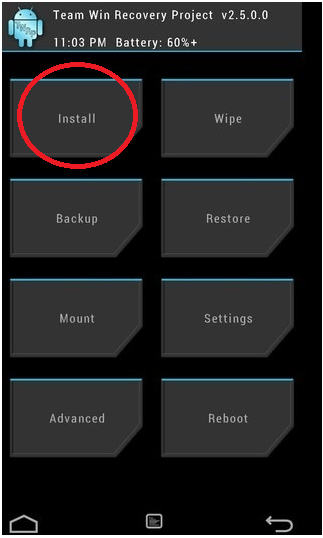
- Now go back to main Menu & select “Install” option.
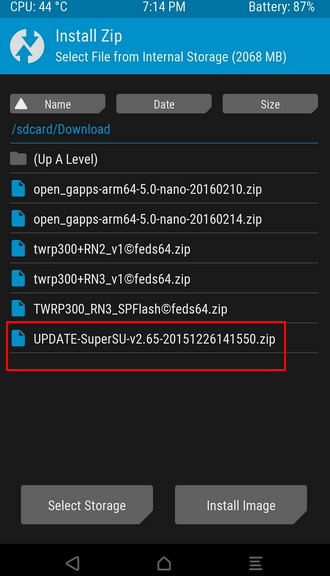
- Browse the Downloaded Supersu file .which you placed into the phone storage.
- After selecting the SuperSu file just swipe the button to flash the root file.
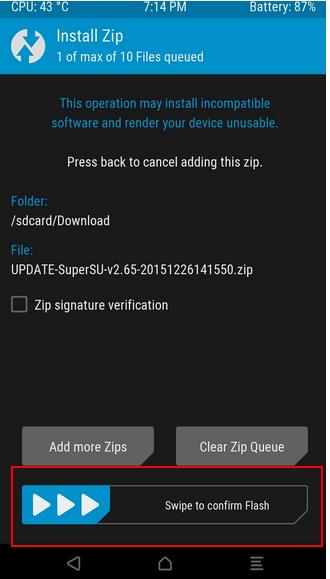
- It will take few minute to flash the supersu file.
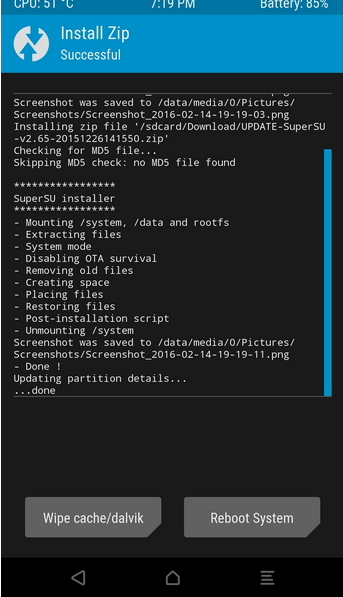
- Now go to “System” and reboot your device normally.
- All Done!!! Now you have rooted Samsung Galaxy j2 Sm-J200F 5.1.1 in your hand.
Check Root Status
- After rooting your Samsung galaxy j2 without pc now its the time to know is it properly rooted or Not? Download root checker app from play store and install on your device and then launch the app.here you can see a message “congratulations ,you device is rooted now”.
This is all about “how to root and install twrp recovery on samsung galaxy j2 sm j200F lollipop version?”now you can perform many task on your rooted samsung j2 like can install custom rom,can increase RAM,can increase internal storage abd also can increase battery life of your device.moreover you can change device id ,change imei number and android id etc for unlimited earning.
Till now if you have any problem regarding this post then feel free to ask us by leaving your valuable comments.we will try to solve it for you as soon as possible.

If you want you can follow us on our YouTube Channel [New Information Era] for more interesting videos & updates .