How To Root Asus Zenfone 3 & Install TWRP For Zenforne 3
Root Asus Zenfone 3 : Here is good news for all Zenfone 3 users. Official TWrp recovery is now available for Asus Zenfone 3 ZE552KL and ZE520KL mobile. Download custom recovery 3.0.2 from below download section and learn how to install twrp recovery for Asus Zennfone 3 ZE520KL & ZE552KL series? After twrp recovery installation, you are free to flash supersu exploit or magisk installer to get root access on Zenfone 3 Smartphone.
In this tutorial we will show you a complete detail overview about Asus Zenfone 3 twrp installation and root procedure.
If you are trying to root Asus Zennfone 3 ZE520KL & ZE552KL series then you have landed on right place. This tutorial will help you to find official twrp recovery for Asus Zennfone 3 ZE520KL & ZE552KL series mobile and latest SuperSu or magisk file to root Asus Zennfone 3 ZE520KL & ZE552KL series Smartphone.
About Asus Zenfone 3
Asus Zenfone 3 was launched in May, 2016. Asus Zenfone 3 is Dual SIM, 4G Lte supportable 5.5 inch big screen Smartphone. Out of the box you can find it with Android 6.0.1 [Marshmallow] version with upgradable Nougat 7.0.x facility. Qualcomm MSM8953 Snapdragon 625 chipset, Octa-core 2.0 GHz Cortex-A53 CPU, 64 GB, 4 GB RAM or 32 GB, 3 GB RAM and dual-LED dual-tone flash are enough to boost it’s performance and speed.
But if you are an advance android user then no one can’t limit you in any how condition. So rooting is perfect if you wish to use your Zenfone 3 with full potentials. Root access allows user to customize or modify your device in your own way. After getting root access on Asus Zenfone 3, you can modify your device by installing custom rom to get latest android features, can change imei number or device ID, increase Android RAM and internal storage etc. Moreover, you can remove pre-installed apps and also can Swap internal to external to boost up speed and performance of your rooted device.
So now if you are ready to root Asus Zennfone 3 ZE520KL & ZE552KL series mobile, go ahead for next step and follow the below instructions as it is.
Make sure you are downloading custom twrp recovery for Asus Zennfone 3 ZE520KL & ZE552KL from our downloading section only.
Important Points Before Root Asus Zennfone 3
- This twrp recovery is only and only for Asus Zennfone 3 [ZE520KL & ZE552KL] mobile. Don’t try to flash it on any other device.
- Follow the steps one by one as it is. One wrong step may brick your device pernamentely.
- Twrp recovery installation will wipe all user data and phone data completely.
- Charge your device approx 80% to prevent accidental power off in between root process.
Download TWRP For Asus Zenfone 3 & Root files
TWRP recovery for Asus Zenfone 3 [Select according to your own device]
Please Note –
If your device is Asus Zenfone 3 ZE520KL, download twrp-3.0.2-Z017D.img
OR
If your device is Asus Zenfone 3 & ZE552KL, download twrp-3.0.2-Z012D.img
SuperSu [Root File] Or Magisk Installer
[Use any one from SuperSu or Magisk to root Asus Zenfone 3]
How To Root Asus Zenfone 3 & Install TWRP
In order to root Asus Zenfone 3 ZE520KL or ZE552KL device, you have to unlock bootloader first then install twrp recovery. In the lash you may use magisk installer app or SupderSu exploit to root Asus Zenfone 3 using twrp recovery.
[a] Unlock bootloader on Asus Zenfone 3 [b] Install TWRP recovery on Asus Zenfone 3 ZE520KL & ZE552KL [C] Flash Super Su & root Asus Zenfone 3[a] Unlock bootloader on Asus Zenfone 3
Bootloader must be unlock to get root access on Asus Zenfone 3. Without unlock bootloade you can’t make any changes on your own device.
Follow the below link to unlock bootloader of Asus Zenfone 3.
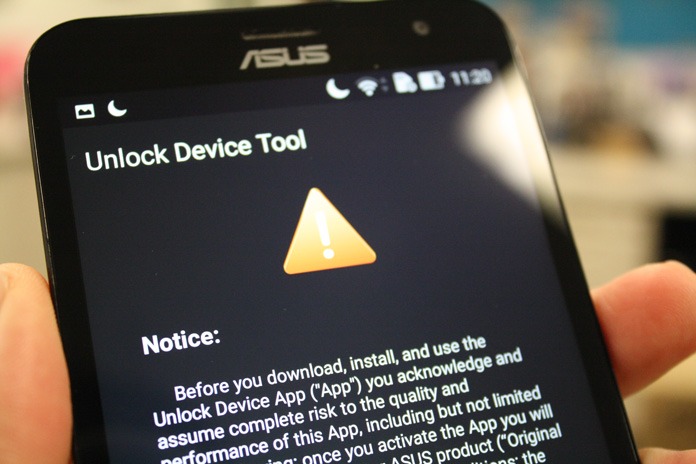
After unlock bootloader come here again and continue the below steps.
[b] Install TWRP recovery on Asus Zenfone 3 ZE520KL & ZE552KL
Once bootloader unlocked on your device, install custom twrp recovery for Asus Zenfone 3 to replace default stock recovery. TWRP recovery allows you to flash supersSu or magisk file easily. Stock recovery never every permit you to flash these types of flashing files.
So now install twrp recovery on Asus Zenfone 3 first.
- Enable USB debugging on your device.
- Download twrp recovery from above link and rename it as “recovery.img”.
- Install “minimal adb & fastboot tool” on pc.
- After installation of “adb & fastboot tool”, go to installation directory.

- IMPORTANT – transfer the downloaded twrp recovery into adb folder and rename it as “recovery.img”.

- Click anywhere in the adb folder, Press & hold “Shift” key + “right mouse” key and select “open command window here” option.

- Connect device with pc via USB cable. [Make sure usb debugging and oem unlocked already]
- Type below command to check adb debug mode between device and pc.
adb devices
- Again type command to boot device into fastboot mode or bootloader mode.
adb reboot bootloader
or
[If the command is not working, boot device into fastboot mode manually]adb reboot fastboot
- This time type the below command again.
[Command will shopw all attached fastboot devices]fastboot Devices
- Flash twrp recovery on the device by using below command
fastboot flash recovery recovery.img
- Finally reboot the device by following below command.
fastboot reboot
Now device will reboot into normal mode again. Done!!! You have successfully installed twrp recovery on Asus Zenfone 3 mobile.
[C] Flash Super Su & root Asus Zenfone 3
Here in this post we are using Supersu exploit to root Asus Zenfone 3. Otherwise, you may root Zenfone 3 by flashing magisk.
Flashing process are almost same for both Supersu and Magisk.
Learn how to flash magisk file to root any device?
Follow the instructions to flash SuperSu file using twrp recovery.
- Plug your device with pc via USB cable and transfer “SuperSu” zip file into internal storage of your device.
- Boot device into TWRP recovery.
- Select your preferred language from the list and set it according to you and tap on “never Show this screen on boot again” and swipe allow modifications.
- From Twrp recovery, tap on “Install” button and browse the “Supersu zip” file and swipe to confirm flash.

- Here it may take few minutes to flash SuperSu file on your device.
- Once done!!! Reboot your device normally.
- All Done!!!
Setup your device again and find the “SuperSu” app into your device app drawer. If it’s there that means Zenfone 3 is now rooted. For more, download “Root Checker” app from Google play store and install it.

It will ask to allow root access and you will see a congratulation message on the mobile screen.
This is all about how to install twrp recovery on Asus Zenfone 3 and how to root Asus Zenfone 3 safely? Now are fully ready to use your device with full potential and can install all root required apps and apk easily.
Alternate Method To Root Zenfone 3 Using ToolKit
Here is another an other way to root Zenfone 3 Using ToolKit. It allows you to unlock bootloader, twrp recovery installation and root flash in one single click.
If you are newbie user and getting any issue to root Zenfone 3 Using ToolKit by using above method you may use Zenfone 3 Root ToolKit.
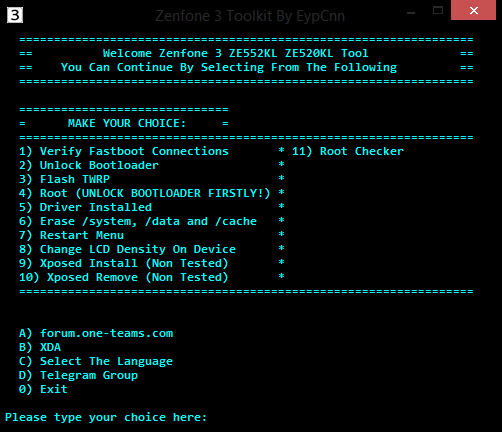
- Download Zenfone 3 ToolKit
- Install it on pc.
- Install minimal adb and fastboot tool.
- launch Zenfone 3 ToolKit on your windows pc.
- Enable USB debugging on your pc and plug it with pc via USB cable.
- Select tool options for any task.
Check our android tweaks and trick section for more mode apps, custom ROM and other android tricks.