How To Add Pages In Google BlogSpot Blog
you can display or publish your content with two method in BlogSpot . post and Page .normally we use post for content.in the same way Blogger static pages allow you to create specific pages for your blog like “ About you “ , “Contact Pages” “,Policy” etc. basically both page and post are same but several things make them different with each other.
Generally we use pages in navbar so our web user can access them easily. Static pages don’t appear in the home pages and not index as archive pages.
Important : you can create maximum 20 pages .create About me , contact us , Privacy Policy and FAQ pages if you want get index your blog fast in Google.its a important technique for SEO.
Step 1. Login in BlogSpot with Gmail ID and open your dashboard.
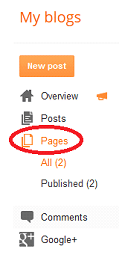
Step 2. Click on Pages (third option in the left side bar)
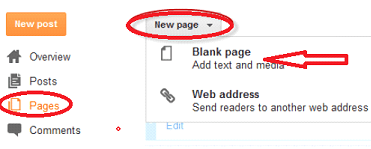
Step 3. Now click on “NEW Page” and select “Blank Page “
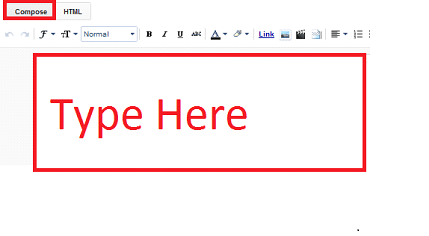
Step 4. Now select “Compose” and type your page title and start write the page contents.
Step 5. Here is a option “Preview” .by this you can see how your content page will appear after publish online.
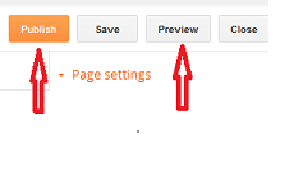
Step 6. After preview your page you can publish by clicking on “Publish” button.
Step 7. You will see three options
> Keep it as nav menu below header
> Display the page in your blog”s sidebar
> Add the pages link manually to your template.
Step 8. After choosing option of display your page location now click on “save Arrangement “
Now you are done and your page is live for your visitors. Add more pages by using these steps.