Root ASUS Zenfone Max Pro M2 & Install TWRP Recovery
Root ASUS Zenfone Max Pro M2 & Install TWRP Recovery
Recently we posted an article to unlock bootloader of ASUS Zenfone Max Pro M2 mobile. So if you have bootloader unlocked ASUS Zenfone Max Pro M2 in your hand, that means you are free to root your device now.
Here in this root guide, we will show you the easiest method to root ASUS Zenfone Max Pro M2 including twrp recovery installation. This ASUS Zenfone Max Pro M2 root method is 100% working and tested, so you can try it to root ASUS Zenfone Max Pro M2 without any dead risk.
Simply install custom twrp recovery in ASUS Zenfone Max Pro M2 and then flash supersu or magisk root file to get full root access on ASUS Zenfone Max Pro M2 mobile.
Probably, you may know that bootloader of the device must be unlock before going to apply root procedure. Otherwise, you can apply any modification or customization. So in order to root ASUS Zenfone Max Pro M2, unlock bootloader of ASUS Zenfone Max Pro M2 by following below guide and then come here again to flash twrp and root your device.
How To Root ASUS Zenfone Max Pro M2 And Flash TWRP Recovery
As we already told you, rooting any android device is an easy task but if you are applying the correct files and procedure. Otherwise, one single wrong step may brick the device permanently. So now if you are ready to root ASUS Zenfone Max Pro M2 mobile, follow the instructions as it is as shown below.
Download TWRP Recovery And Root Files To Root ASUS Zenfone Max Pro M2
TWRP Recovery File For ASUS Zenfone Max Pro M2 : DOWNLOAD 01 OR DOWNLOAD 02
Root File For ASUS Zenfone Max Pro M2 [Magisk ] : DOWNLOAD 01
Decrypt.zip file For ASUS Zenfone Max Pro M2 : DOWNLOAD 01 OR DOWNLOAD 02
Minimal ADB & Fastboot Tool : DOWNLOAD
Pre-Requirements To Root ASUS Zenfone Max Pro M2
- Download all the files on pc.
- Enable USB Debugging on ASUS Zenfone Max Pro M2 mobile.
go back to settings -> Developer Options -> Enable the USB Debugging.
- Charge the device approx 80% to prevent accidental power off in between rooting process.
- Working USB Cable and windows cp / laptop.
In order to root ASUS Zenfone Max Pro M2, we can split whole process in three major categories. Now follow the steps one by one and gain root access without having any issue.
Let’s see how to install twrp recovery and root ASUS Zenfone Max Pro M2 safely?”
Step02 Flash TWRP Recovery On ASUS Zenfone Max Pro M2
Step 03 Flash Magisk And Root ASUS Zenfone Max Pro M2
Step01 Unlock Bopotloader Of ASUS Zenfone Max Pro M2
Bootloader unlocking is the most important step before going to root or flash twrp recovery in ASUS Zenfone Max Pro M2 mobile. Locked bootloader never allow you to apply any changes like custom recovery, custom ROM flash and root etc.
So unlock the bootloader of the device by following the below guide. No need to ask for permission from ASUS team to unlock bootloader. Use the un-official method for quick bootloader unlock without permission.
Step02 Flash TWRP Recovery On ASUS Zenfone Max Pro M2
Once you have bootloader unlocked ASUS Max Pro M2 mobile in your hand, you are free to go for next step. So now you have to flash TWRP recovery on ASUS Zenfone Max Pro M2 and then you can flash magisk file using twrp recovery.
- Download “Magisk file”, “twrp recovery” and “Decrypt.zip” and save them in any one folder for easy navigation.
- Now Boot ASUS Zenfone Max Pro M2 into fastboot mode manually.

- Connect the device with pc via USB cable.
- In next step, Download and install “Minimal adb & fastboot tool” on pc. [ 15 sec. process]
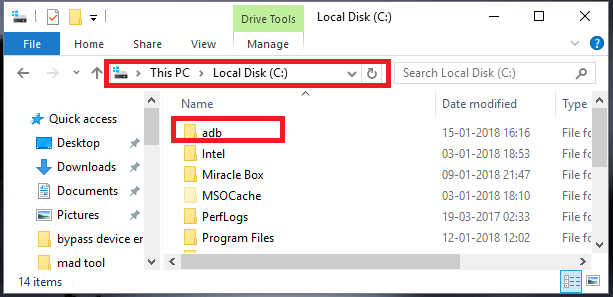
- Open “Adb Folder Location on pc. [ Don’t close this folder]
ADB Folder Location : My Pc >> C Drive >> ADB Folder
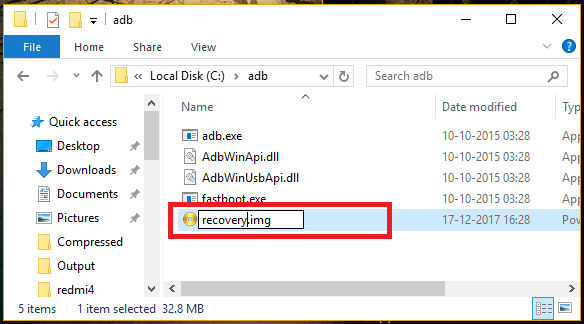
- Unzip the downloaded TWRP recovery zip file and rename it as “recovery.img” file and move it into “ADB Folder” as shown below.
- Click anywhere into adb folder, press & hold “Shift” key + “Right” click, select “Open command window here” or “open powershell window here” option as shown in below screenshot. It will open a new commend window on pc.
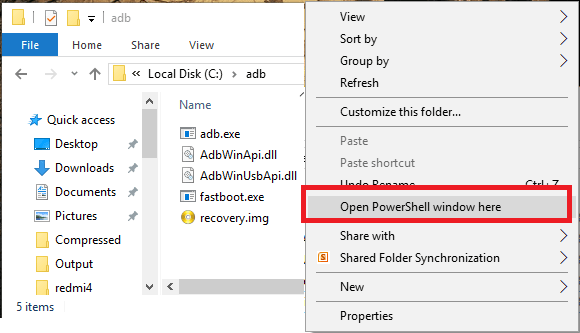
- Type the below command and hit enter to execute it.
fastboot flash recovery recovery.img[Above command will flash twrp recovery in ASUS Zenfone Max Pro M2 within few seconds]
- Boot Device Into Recovery Mode: Now disconnect the USB cable and Press & Hold Volume Down key + power key together at the same time [ release all the keys once it vibrate]. Device will boot into recovery mode.
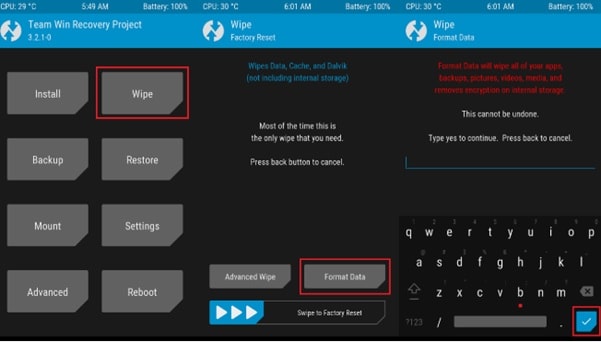
- Once you are into “TWRP Recovery menu”, click on “Wipe” option >> “Format Data” >> Type “YES” >> Done!!!
Wipe option is must for clean twrp recovery installation. Otherwise, device may stuck in bootloop or may hang on logo.
- Go back to main “TWRP Menu” >>> “Mount” option >> tap to change “Diable MTP” and select “Cache, data, system, vendor” as shown below and connect the device with pc via USB cable.

- Come to the pc again and copy or move “magisk.zp” file and “Decrypt.zip” into the phone’s internal storage. Now can remove the usb cable.
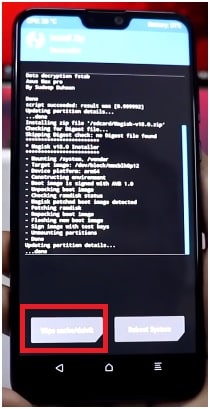
- Click on “Install” option from recovery menu, select “Decrypt.zip” and swipe to allow flash. It will take just couple of seconds.
- Done!!! TWRP recovery flashed on ASUS Zenfone Max Pro M2 safely.
Twrp recovery installed on ASUS Zenfone Max Pro M2 mobile and you can reboot the device. In case want to root the device, go for next step.
Step03 Flash Magisk And Root ASUS Zenfone Max Pro M2
Here we are using magisk root package to root ASUS Zenfone Max Pro M2 mobile.
- Connect the device with pc and move “magisk.zip” file into phone’s storage. Skip the step if already done.
- Boot device into twrp recovery mode manually.
Power off >> Press & hold volume down key + power key together at the same time, release all the keys once it vibrate
- Tap on “install” button, browse “magisk.zip” file from internal storage and swipe to allow flash. Here it may take few minutes to flash complete magaisk root file.

- End of the process, click on “Wipe catche/delvik” >>”Do not install” and device will reboot automatically.
- Done!!! Magisk file flashed and it will root the device.
Check Root Status Of ASUS Zenfone Max Pro M2
If you were following the complete steps properly that means you have rooted the device successfully. For more, download any root checker app from Google Play store and check root status of the device.
This is all about ASUS Zenfone Max Pro M2 root and twrp flashing method. It’s 100% working and safe method to root ASUS Zenfone Max Pro M2 mobile. So you can try it without any issue.