100% fix – Unable To Mount Storage TWRP | Internal Storage 0 MB
fix Unable To Mount Storage TWRP | Internal Storage 0 MB
Are you searching a perfect method to fix unable to mount storage, internal storage 0 mb error in TWRP recovery? Yes then you have landed on right place. Here in this post we will share two different methods to solve unable to mount storage TWRP / internal storage 0 mb twrp. Both methods are universal for all android devices. Methods are different because, reason may be different for different devices. So start with first solution to remove internal storage 0 unable to mount storage on TWRP recovery.
If you are trying About ……………..
Unable to mount storage twrp is very common issue while flashing stock ROM or any third party custom ROMs. If you are facing the same issue or error in twrp recovery, just follow the below guide and remove this twrp error – Unable To Mount Storage [Internal Storage 0 MB] without any issue. No need to flash Rom or twrp to remove this error. Just change the few setting of the installed TWRP recovery and get ride on this problem.
Many users reported that they are unable to wipe data using twrp recovery and getting error at the time of wiping cache/data/internal storage/delvic/ART cache from twrp. As a result, it’s showing red strings with “unable to mount storage twrp” or “internal storage 0 MB twrp error” and they are unable to wipe anything.
Same as if you have internal storage 0 MB then you can’t backup using twrp or can’t restore backup of the device. Both error’s screenshots are listed below.
Errors In TWRP Recovery With Screenshot
Unable To Mount Storage TWRP Error – During Factory Reset

Internal Storage 0 MB TWRP Error – During Bckup/Restore/Wiping

Reasons Of Unable To Mount Storage TWRP, internal storage 0 MB
As I already told you, reasons may be different for different devices but you will face this problem at the of factory reset using TWRP custom recovery /during the backup or restore etc. As a result, device may stock in bootloop or may stuck on logo.
Most of the time it happens because of wrong image file flashing, wrong/unsupported zip file flashing or system partition changed of system files.
Here are some reasons of twrp error – Unable To Mount Storage or Internal storage 0 MB error
- Most of the time Unable To Mount Storage TWRP error accrue when you will do factory reset your device with twrp ans system partition are corrupted.
- Or, when you flash any image file into the wrong partition.
- Or, when you installed wrong or unsupported zip file by twrp recovery.
- Or, reason may be because of your phone lock [Only for internal storage 0MB]
Because of these errors, sometime device does not boot or may stuck in bootloop too. Moreover, device internal storage will become 0 MB.
So now the question is that how to fix Unable To Mount Storage on TWRP? Solution to remove this twrp error is very simple and 100% working. You need to change some setting of twrp. That’s it.
When You Will Face Unable To Mount Storage or Internal Storage 0 MB TWRP Error
- If device showing internal storage 0MB and then you will try to backup ROM or restore the older backup of the device, it will show error internal storage 0 unable to mount storage [Nandroid Backup]
- Same as, if you are going to flash new custom ROM or any stock ROM, it’s necessary to wipe previous ROM cache and data. So at the time of factory reset, it will show error unable to mount storage twrp.
Solution To Fix Unable To Mount Storage TWRP | Internal Storage 0 MB TWRP Error
Method01
Fix Internal Storage 0 MB In TWRP: Basically it’s happen because of encrypted system files of the device. So you have to decrypt it again to fix this issue.
- First off boot device into normal mode.
- Once the device booted properly, Go to phone “setting” >> “Lock Screen & Security” >> “Screen Lock Type” and remove the pattern lock and enable PIN Lock/password lock.
- Now boot the device again into twrp recovery.
- Here it will ask you to enter the password to access twrp recovery. Just enter the same security PIN/password of your device [Only if you are using PIN lock but avoid pattern lock].
- Now it will start decrypting system files of the device and you are free to create nandroid backup, restore ROMs or can wipe data by factory reset without error.
- This time it will not show you internal storage 0 MB or unable to mount data.
- Done!!!
Method02
Fix Unable To Mount Storage TWRP: If you are trying to factory reset your device using twrp recovery and it’s displaying unable to must data then follow the below instructions.
- First off all remove pattern lock from device and add PIN lock/password as a security lock as shown in above method.
- Still getting “unable to mount storage twrp error” then go to main menu of twrp recovery.
- Click on “WIPE” option >> “Advance Wipe” >> select “Cache” >>click on “Repair or Change File System” >> “Change File System” >> click “F2Fs” and “swipe to Change”
- Again Go back and select >> “EXT4” option >> “Swipe To Change”
Now repeat the same process with “System” option and “Data” option one by one.
After doing that you are free to wipe or factory reset your device without any TWRP error. This time it will not show the unable to mount storage in TWRP recovery.
What TO Do – Unable TO Boot Into TWRP Recovery
This step is for those users only, who are unable to boot device into twrp recovery using key combinations.
Because of these errors, it may possible device stuck in bootloop and you are unable to boot it into twrp recovery mode again.
- First of all try to boot device into twrp recovery manually by pressing hardware keys.
Power Off >> Press & Hold volume up + power key together at the same time.
Till now unable to boot device into twrp recovery, you have to use adb fastboot command .
- Download and install “Minimal adb & Fastboot tool” on pc by following below guide.
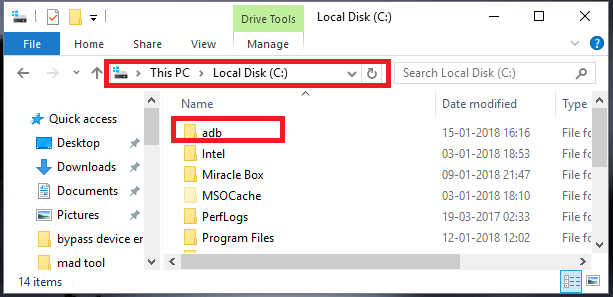
- Now open “adb Folder” location. [ADB Folder Location – My Computer >> C Drive >> ADB Folder.]
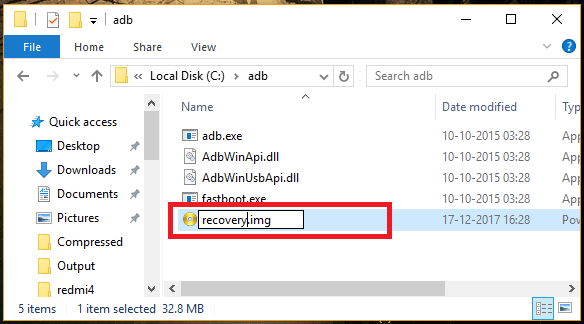
- Copy the twrp recovery [which you were flashing on your device], rename it as recovery.img and transfer it into adb folder as shown below. [This step is must]
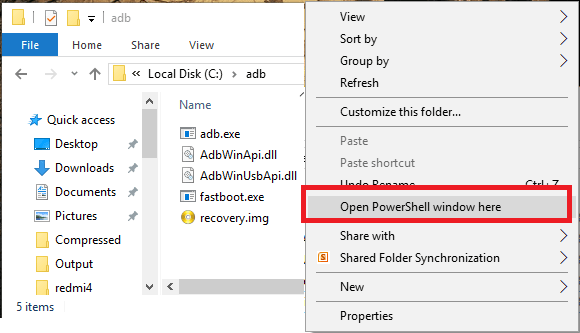
- Once you are into adb folder, press & Hold volume “Shift” key + “Right” click and select “open command window here” or “open powershell window here” option as shown below. It will open a new command window on pc. Don’t close it, we will use it in next step.
- Again come to your device and boot it into fastboot mode/bootloader mode
Fastboot mode or bootloader mode may be different for different devices. For this purpose, do Google or try the below combinations.
OR
Press & Hold volume down key + volume up key + power key together at the same time
- Once the device into fastboot mode/bootloader mode, connect it with pc via USB cable
- Open command window again and type the below command to check device is properly connected with pc into fastboot mode or not?
fastboot devices[After execute the command, if it’s showing some numeric numbers that means it’s in fastboot mode]
- Now again go to the command window and execute the below command.
fastboot boot recovery.img[Please Note: Here recovery.img is the name of the recovery]
- Now command will boot the device into twrp recovery again and you can apply the above methods to fix unable to mount storage twrp error.
READ MORE : Fix TWRP Error 7 – Updater Process Ended With Error 7 In TWRP
This is all about to fix unable to mount data twrp and internal storage 0 MB twrp error within few simple steps. Simply follow all the instructions and apply both methods one by one to resolve TWRP error – unable to mount data / internal storage 0MB.
Till now getting any issue in any step or have any quarry, please leave your comment below.