Root Samsung Galaxy J5 5.1.1 Lollipop Version
This root guide is only and only for Samsung Galaxy J5 Lollipop version. Just read the step by step full post and follow all the instructions carefully to root Samsung Galaxy J5 5.1.1 lollipop version safely.
Here we are listing all supported android version and their model number. Just check your own Samsung Galaxy J5 android version and model number and download appropriate root file to root Samsung Galaxy J5. it is must to download related root package for 100% success rate. Selection of wrong file may brick your phone permanently. So do it carefully or read the full post again & again before performing it on your own device.
Samsung Galaxy J5 Specifications
Samsung Galaxy j5 is one of the most selling android phone,launched in june 2015.the phone comes with a 5 inch touch screendisplay with 720 pixels.if we talk about it’s performance then it comes with 1.5 GB RAM ,8GB internal phone storage and can be expanded up to 128GB via MicroSD card.it has powerfull 1.2 GHz quad-core Qualcomm Snapdragon 410 processor to boost up its performance.
Related Articles
- How to use odin Pc Tool?
- How To install TWRP recovery on any Samsung Android phone?
- How to download latest Odin pc tool?
For more detail you can visit on Gadgets360digree.
Check your phone device model number and version before performing.
Make sure you are downloading appropriate root package according your device model.
We will not responsible if anything goes wrong with your device.
Take backup of your phone data before root.
Now follow all the steps one by one to root Samsung Galaxy J5 5.1.1 lollipop version.
Root Samsung Galaxy J5 5.1.1 Lollipop Version
Step 01 Download Appropriate Root Package
Check your device version and model number then download only related root package.
Check build number – Setting>>About Phone>> here you can see your device build number.
- CF-Auto-Root for SM-J500F
- CF-Auto-Root for SM-J500FDS
- CF-Auto-Root for SM-J500FN
- CF-Auto-Root for SM-J500G
- CF-Auto-Root for SM-J500H
- CF-Auto-Root for SM-J500HDS
Step02 Pre -REQUIREMENTS
- Take backup of your android phone so you can get back your user data. This process will delete all data like contacts, messages, applications etc.
- Download and install Samsung Galaxy USB drivers on pc [MUST]
- Charge your phone aprox 60%
- Download Latest Odin flashing tool on PC.
Step03 Enable USB Debugging & Oem Unlock
- To enable developer option go to your phone setting>> About phone.
- Tab on build number option for 7 times .now you will get the message “you are now a developer”.
- Go back again and enter into the “developer”
- Now find the “USB debugging” option and enable it.
- Same as you will see the “OEM” option then enable it.
- Make sure you don’t have factory reset protection enabled in your Google Account otherwise you may never be able to boot again.
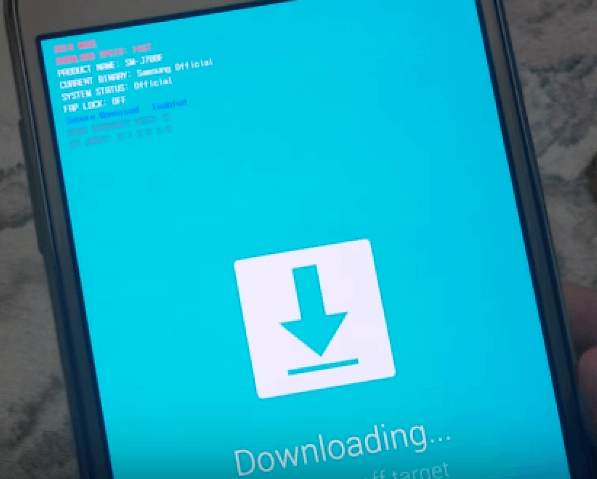
Step04 Boot Phone Into Downloading Mode
- Switch off your phone first.
- Now press & hold Power+Volume Down +Home key together.
- Here you will see a warning message on screen.
- Press Volume Up key for once.
- Now you will be into “Downloading Mode” option.
Step05 Root Samsung Galaxy J5 5.1.1 Lollipop Version
- Make sure USB debugging is ON.
- Make sure Samsung USB drivers are installed on pc.
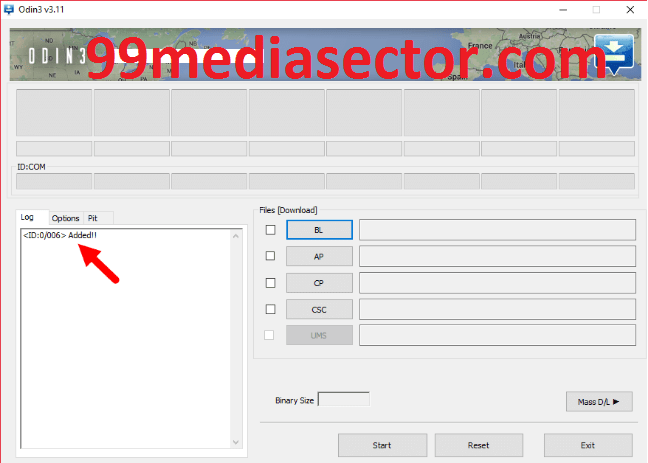
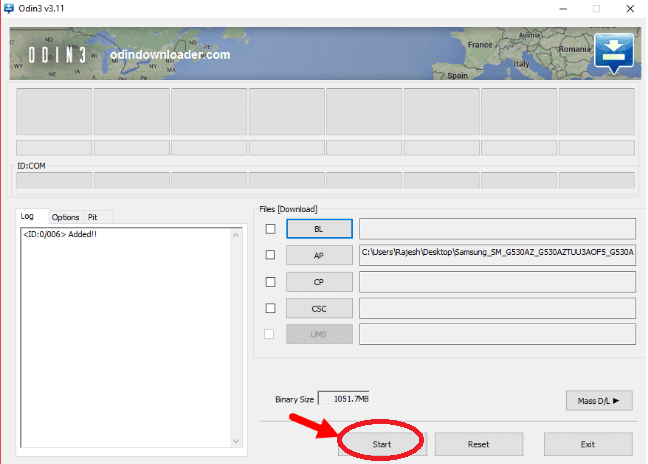
- Now run the downloaded ODIN pc suite on pc.
- Now connect your phone with PC via USB cable [Make sure it’s in downloading mode].
- Now you will see the message “ID:COM:” in odin that means phone is connected properly and you are ready for next step.
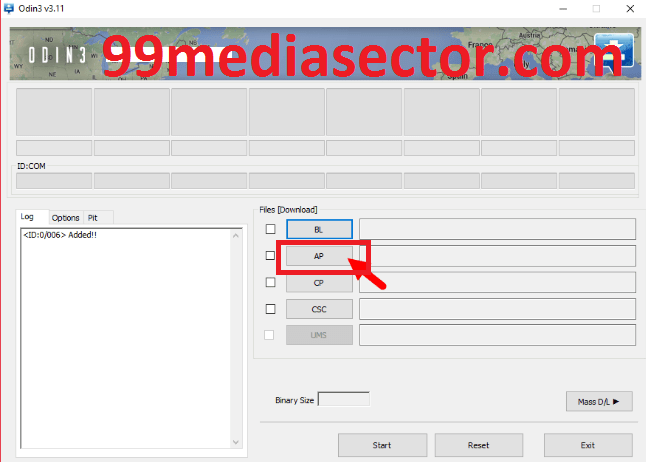
- Click on “AP” or “PDA” option and browse the “Cf-Auto-Root” file which you have downloaded from step01.
- In odin ,check the “Auto Reboot” and F.”Reset Time” option.
- Now hit enter on “START” button to continue the process.
- It may take few minute to complete the process.
- After completing the process,phone will reboot into recovery mode automatically and install the root package.
- If everything is OK then you will see a green “PASS” message on odin.
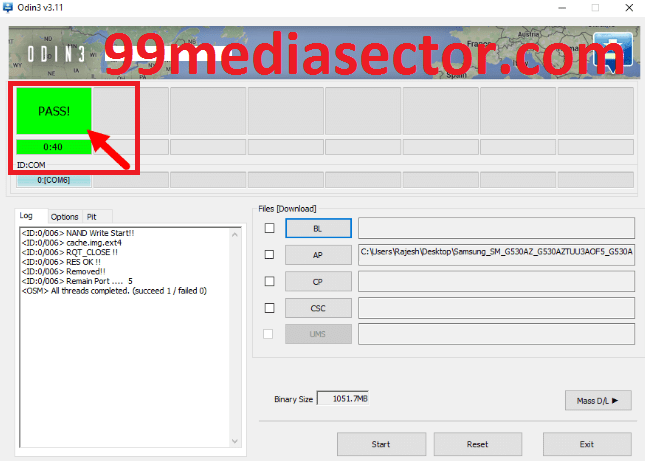
- Now disconnect your phone from pc.
- Just repeat the whole process again but make sure “Auto Reboot” option is unchecked and after hitting on”Start” button process will end and then boot into recovery mode manually.it will start again rooting process again.
- All Done!!!
Now you have rooted your Samsung Galaxy j5 lollipop version successfully. To make sure about root, you have to download Root checker from play store.
I hope all the steps are clear in your mind and now you are able to root Samsung galaxy j5 5.1.1 lollipop version. Till now if you have any quarry or any problem regarding this root guide you can ask us by leaving your valuable comments. We will try to solve it for you as soon as possible.
Incoming Search Terms
root Samsung Galaxy J5 SM-J500M on Android 5.1.1
Root Samsung Galaxy J5 SM-J500F
How to root Samsung j5 j500f lollipop 5.1.1
 If you want you can follow us on our YouTube Channel [New Information Era] for more interesting videos & updates .