How To Install TWRP Recovery On Samsung Galaxy J2 [100% Working]
Hey Samsung J2 users ,if you are searching a way to install TWRP recovery on Samsung Galaxy J2 then you are on right place and no need to go anywhere to learn “how to root and install TWRP on Samsung Galaxy j2 SM-J200G?”just follow all the steps one by one as shown in this post and install TWRP recovery on your Samsung j2 safely .
 BUY Samsung Galaxy J7 Gold With Discount

Every Smartphone comes with stock recovery to perform many task like factory hard reset, OTA update, update with adb etc but if you are an advanced user then it’s not enough for you and you should use Custom recovery like TWRP recovery which works on touch.
as we all know Samsung is one of the largest smartphone selling company.Same as Galaxy series is most popular and success series of samsung android phones.but today we will talk about Samsung galaxy j2 only.Samsung Galaxy j2 was released in April ,2016.if we talk about its version then it comes with Lollipop 5.1.1 android version and now its upgrdable on 6.0.1 marsmallow.its an official update for samsung galaxy j2 users.but main problem is that it comes with lots of preinstalled apps and most of them are not very usefull for us.if you want you can override on this unwanted apps by rooting your j2 .by deleting these unwanted or preinstalled apps you can make free your presious internal storage and RAM.we will talk about rooting in our next post post.because before that we are going to install twrp recovery on samsung galaxy j2 Sm-J200G
How to Disable Preinstalled apps without root?
Now come to the point and read our full detail post to know “how to install TWRP recovery on Samsung Galaxy J2 200 G Lollipop 5.1.1?”
How To Install TWRP Recovery On Samsung Galaxy J2
Step 01 Pre-Requirements
- Take backup of your phone data like message,contacts,photos & videos.
- Charge your phone aprox 60%
- Data cable or USB cable to connect your phone with pc.
Step02
- Download Samsung USB drivers & install it on your pc.
- Download Latest ODIN pc tool for pc.
- Download TWRP recovery file to install TWRP recovery on samsung galaxy j2 Sm-J200G 5.1.1 Lollipop version .[TWRp For Samsung Galaxy J2]
Step 03 Enable USB Debugging & OEM unlock
- To enable developer option go to your phone setting>> About phone.
- Tab on build number option for 7 times .now you will get the message “you are now a developer”.
- Go back again and enter into the “developer”
- Now find the “USB debugging” option and enable it.
- Same as you will see the “OEM” option then enable it.
- Make sure you don’t have factory reset protection enabled in your Google Account otherwise you may never be able to boot again.
Step 04 Boot Samsung Galaxy j2 Into Downloading Mode
- Switch off your phone first.
- Now press & hold Power+Volume Down +Home key together.
- Here you will see a warning message on screen.
- Press Volume Up key for once.
- Now you will be into “Downloading Mode” option.
Step 05
Install TWRP Recovery On Samsung Galaxy J2 SM-J200G
- Make sure Samsung USB drivers are installed on pc.
- Make sure USB debugging is already enabled on your phone.
- Make sure your phone is into downloading mode.
- Now copy the downloaded Samsung Galaxy j2 TWRP recovery file and place it on pc.
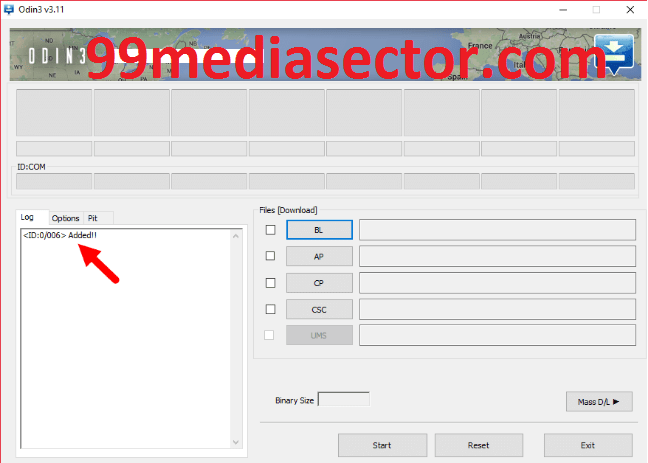
- Now open the download ODIN on your pc and run the ODIN exe file.
- Now again connect your phone with pc via USB cable.[Phone should be into downloading Mode]
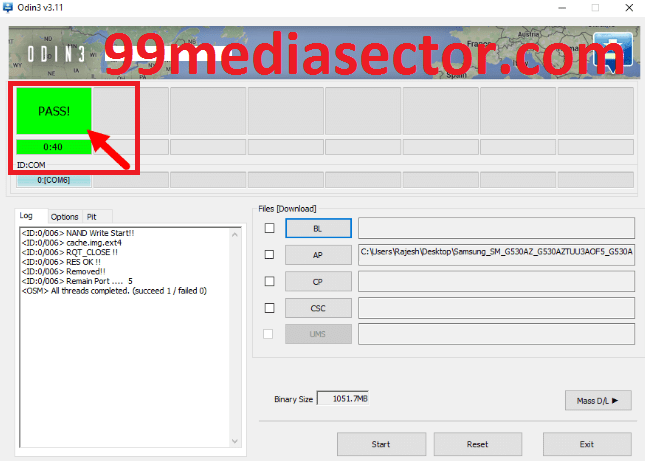
- Now you will see the message “ID:COM:” in odin that means phone is connected properly and you are ready for next step.
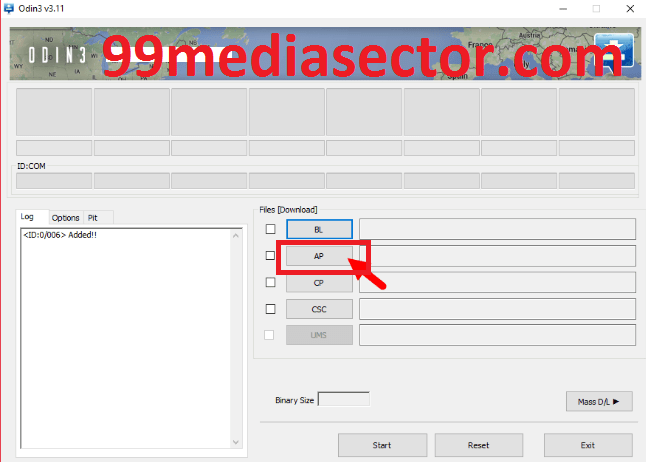
- Click on “AP” or “PDA” option and browse the J2 TWRP recovery file.
- Now click on “START” button and run the process.
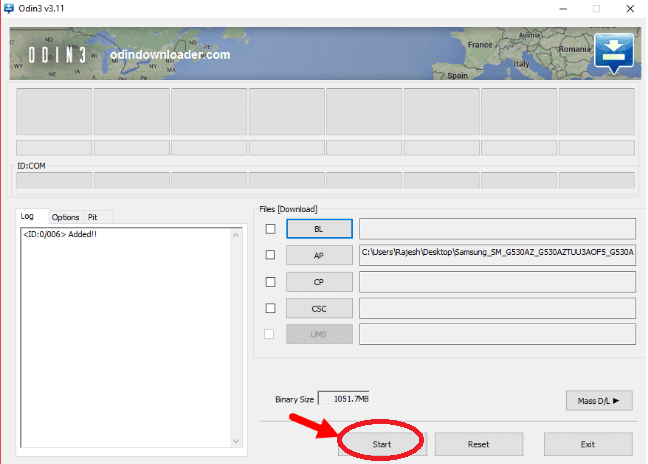
- If everything is OK then you will see a green “PASS” message on odin. That means TWRP recovery has been installed on your phone.
- Now phone will reboot into twrp recovery automatically. If not then you can check TWRP recovery is properly installed or not by entering into recovery mode manually. Just power off >>Press & hold Volume Up+Home+Power key together and boot into recovery mode.

- All Done!!!
Congratulations you have installed TWRP recovery on Samsung galaxy j2 SM-J200G by odin tool and now you are ready to root your Samsung galaxy j2 by flashing super su file using TWRP recovery.if you want you can read our next post “How to root samsung galaxy j2?”
 If you want you can follow us on our YouTube Channel [New Information Era] for more interesting videos & updates .
Incoming Search Terms
How To Install TWRP Recovery On Samsung Galaxy J2
Install TWRP 2.8.7.0 Recovery on Samsung Galaxy J2
twrp for samsung galaxy j2
samsung j2 200G twrp recovery
Twrp recovery file for samsung j2
TWRp for Samsung Galaxy j2
J2 TWRP file
install recovery on samsung j2