Install TWRP Recovery On Redmi 6A / Redmi 6 / Redmi 6 Pro & Root Safely
Install TWRP Recovery On Redmi 6A / Redmi 6 / Redmi 6 Pro & Root Safely
Recently Xiaomi launched its brand new Redmi 6 series in India. In that series Xiaomi released three new smartphones – Redmi 6A, Redmi 6 & Redmi 6 Pro. Technically all three smartphones are based on MIUI 9.6 with android Oreo 8.1 version and promised to get latest MIUI 10 update very soon in coming days.
As we all know all these Redmi 6A, Redmi 6 & Redmi 6 Pro has been launched for Indian consumer, so many users already bought the phone. Some of them who are involved in rooting or customization want to install TWRP on Redmi 6A / Redmi 6A / Redmi 6 Pro mobile and want to root Redmi 6 series devices.
So here in this post we are going to share complete step by step tutorial to root Redmi 6 Pro / Redmi 6 A / Redmi 6 MIUI 9 phones.
It’s must to know that TWRP recovery may be differnet for all these Redmi 6 series devices but rooting process is completely same. So download appropriate TWRP recovery according to your own device and follow the steps as shown below.
Points To Remember Before Root Redmi 6 / Redmi 6A & Redmi 6 Pro
Before going to jump into twrp recovery flashing or rooting process, you have to know that bootloader of the device must be unlocked. Otherwise, you can’t flash twrp on Redmi 6 / Redmi 6A & Redmi 6 Pro devices. Same as, twrp recovery is the most important part of this rooting mehod because we will flash root file [Magisk] using twrp recovery. TWRP recovery will replace default stock recovery of the device.
Flash TWRP & Root Redmi 6A / Redmi 6 & Redmi 6 Pro
Rooting process is completely safe and tested but one wrong step may brick the device permanently or device may stuck in bootloop. So do it on your risk.
For better result, read the post carefully and then apply it on your own device as shown in tutorial.
Pre-Requirements To Root Redmi 6 Pro / Redmi 6A & Redmi 6
- Remove pattern lock / PIN Lock or any other screen lock on the device. [Pattern lock may cause of unable to mount storage twrp error]
- Install “Minimal ADB & Fastboot tool” on windows pc. [Must to run fastboot commands]
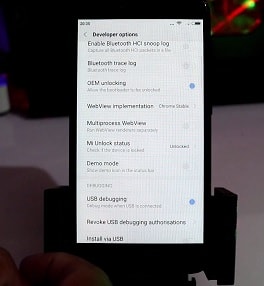
- Enable USB Debugging & OEM unlock.
- Don’t forget to take backup of the device before continue the rooting procedure. Phone data and user data will wipe/erase during to procedure and you can’t restore it again.
Download TWRP Recovery & Root Files For Redmi 6A / Redmi 6 & Redmi 6 Pro
| DOWNLOAD TWRP | DOWNLOAD |
| TWRP Recovery For Redmi 6A | DOWNLOAD |
| TWRP Recovery For Redmi 6 | DOWNLOAD / MIRROR |
| TWRP Recovery For Redmi 6 Pro | DOWNLOAD / MIRROR |
| ROOT FILE | DOWNLOAD |
| Magisk Zip File | DOWNLOAD |
| Dm Verify Disabler File | DOWNLOAD / MIRROR |
To make it easy to understand, we are splitting the whole rooting procedure into three different sections.
Step01 Unlock Boot loader Of Redmi 6A / Redmi 6 & Redmi 6 Pros
Step02 Flash TWRP On Redmi 6A / Redmi 6 & Redmi 6 Pro
Step03 Flash Magisk & Root Redmi 6A / Redmi 6 & Redmi 6 Pro
Step01 Unlock Boot loader Of Redmi 6A / Redmi 6 & Redmi 6 Pro
Bootloader unlocking must be your first step to flash twrp and rooting your device. Because, bootloader locked device will never allow you to apply any changes in system files of the device. Bootloader is security lock of the device, so Unlock Boot loader Of Redmi 6A / Redmi 6 & Redmi 6 Pro using Xiaomi official methods. Follow the below guide to unlock bootloader of any Xiaomi or Redmi devices using official methods.
Step02 Flash TWRP On Redmi 6A / Redmi 6 & Redmi 6 Pro
Once you have bootloader unlocked device in your hand, you are free to flash twrp recovery. Now go through the below guide and flash twrp recovery on Redmi 6A / Redmi 6 & Redmi 6 Pro mobiles.
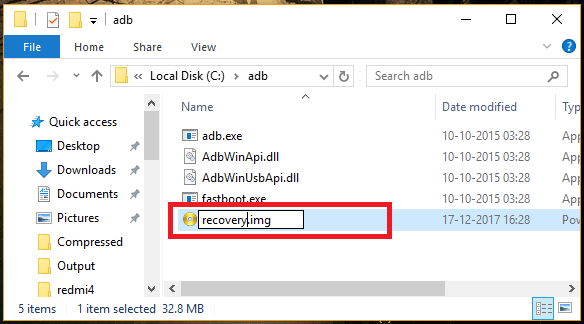
- Download appropriate TWRP recovery image file according to your own device model number and rename it as “recovery.img” file.
EXAMPLE : Rename TWRP-3.2.3-TwrpBuilder-cereus-20180805.img as “recovery.img
- Now download and install “minimal ADB & fastboot tool” on pc. [Skip, if already installed]
- Go to “adb folder” location. [My Computer >> C Drive>> ADB Folder]
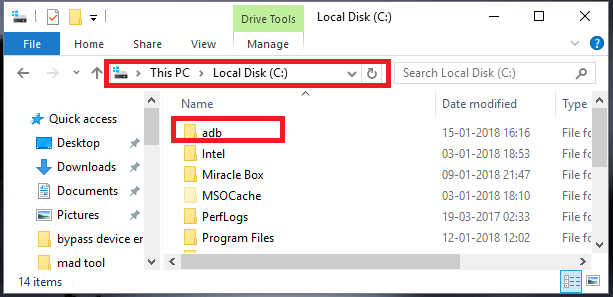
- Again copy the renamed recovery.img file and transfer it into “adb folder” location as shown below.
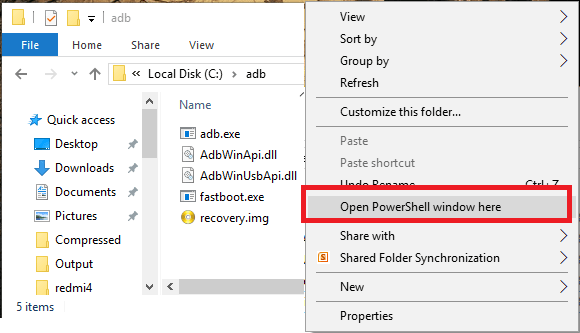
- Click anywhere into adb folder, press & hold “SHIFT” key + “Right” click and select “open command window here” or “Open powershell window here” option. It will open a new command window on pc. [Don’t close it. We will use it in next step]
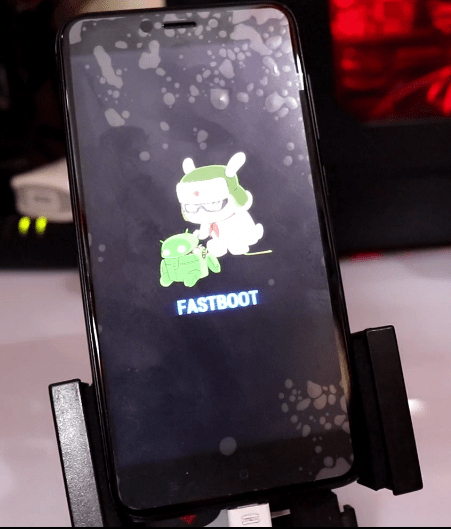
- Fastboot Mode: Come to the device and boot the device into fastboot mode manually. [make sure USB Debugging & OEM unlocked on the device]
Power Off >> Press & Hold Volume Down key + Power Key together at the same time until you see the bunny logo
- Connect the device with pc via USB cable.
- Open command window again and run the below command to check, if the device is properly connected with pc or not.
fastboot devices[Above command will show a new numeric string that means device is properly connected]
- Next execute the below TWRP Flash command to flash twrp recovery on Redmi 6A / Redmi 6 & Redmi 6 Pro mobile.
fastboot flash recovery recovery.img[TWRP recovery will flash just in few seconds.]
- Finally execute the below command to boot device into recovery mode directly from fastboot mode. [Remember : Don’t try to boot device into android OS. Otherwise, it may stuck on bootloop or Mi logo]
fastboot boot recovery.img
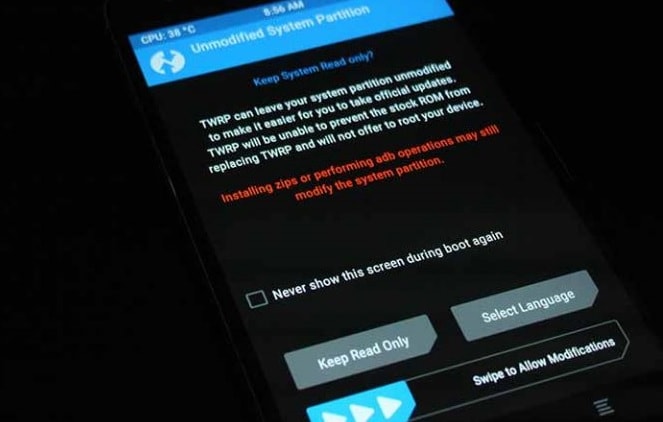
- At first boot, you will see the below screen to select the “Read only” option or “swipe to allow modification” option. You may select anything but we recommend you to select “swipe to allow modification”.
- This time you should be into main menu of twrp recovery.
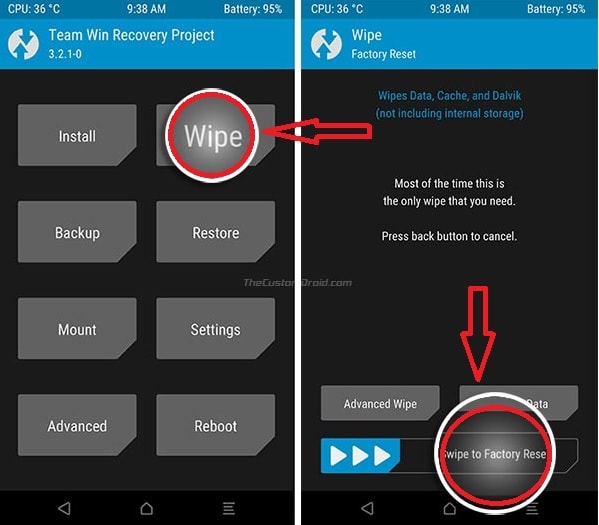
- Tap on “Wipe” >> “Advanced Wipe” >> “Wipe DATA” only.
- Again go to main menu, reboot to recovery and connect the device with pc again and transfer the “Dm Verify Disabler File” into phone storage.
- Next, click on “Install” option, browse the “Dm Verify Disabler File” and swipe to flash.
[Dm Verify Disabler File flashing is must otherwise, device may stuck in bootloop]
- Again click on “Reboot System” and restart the device into android OS.
- Done!!! TWRP recovery installed successfully.
Step03 Flash Magisk & Root Redmi 6A / Redmi 6 & Redmi 6 Pro
Once the custom recovery installed on Redmi 6A / Redmi 6 & Redmi 6 Pro device, you are free to flash Magisk file [Root file] to gain full root access. It’s an universal method to root any device by flashing Magisk root package.
- Connect the device with pc via USB cable and move “latest Magisk Zip file” into phone storage.
- Unplug USb cable and boot device into twrp recovery manually.
- Once you are into recovery menu, click on “Install” option, and navigate to “magisk.zip” file and swipe to flash from next screen.
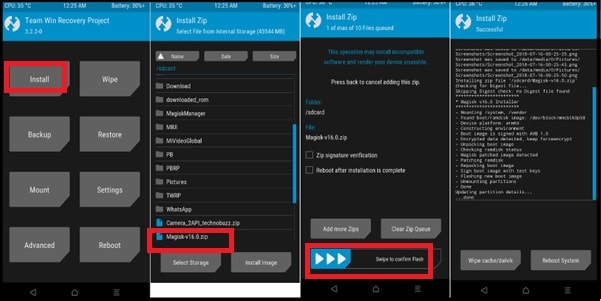
- Once the Zip file is successfully installed on your phone. Click on “Reboot System” >> “Donot install” after flashing magisk file.
- All Done!!
Check phone’s app drawer and find the “magisk” app. If it’s available that means, device is properly rooted without any issue. For more confirmation, download and install any root checker app from Google play store and verify root status.
So guys this is all about how to install twrp recovery and root Xiaomi redmi 6 / Redmi 6a & redmi 6 pro mobile? Process is same for all Redmi 6 devices but twrp recovery is different from each other. So make sure, you are going to use appropriate custom TWRP recovery according to your own model number.