How To Install TWRP Recovery And Root Redmi Y2 Using ToolKit
How To Install TWRP Recovery And Root Redmi Y2 Using ToolKit
Guide to install twrp recovery in Redmi Y2 with root access.
Hey guys, as we all know till now no any Redmi Y2 official twrp recovery is avaliable. But good news is that, you have option to flash un- official twrp recovery on Redmi Y2 MIUI 10 or MIUI 9. That means, you can root Redmi Y2 easily.
Just download Redmi Y2 twrp recovery toolkit and flash twrp and then flash Magisk zip file to get root access. It’s 100% working and tested method to root Redmi Y2 MIUI 10 / MIUI 9 Smartphone.
Many peoples are searching a way to get official twrp recovery for Redmi Y2 but unfortunately, team-win developers are not working on it. So till now, we don’t have official twrp recovery for Redmi Y2.
But in case, you are willing to root Redmi Y2, you can install twrp recovery in Redmi Y2 using twrp flasher toolkit which is specially designed for Redmi Y2. Method to use this twrp flasher toolkit is very easy.
Here in this post we will show all the steps to flash un official twrp recovery on Redmi Y2 using twrp toolkit.
Once you have custom TWRP recovery on redmi Y2, you are free to root Redmi Y2 by flashing Magisk root file. Don’t worry, we will explain all the steps with all necessary screenshots and video.
Important points Before Root Redmi Y2
If you have enough knowledge about custom TWRP and rooting then you may direct jump on twrp and rooting procedure. Otherwise, you have to know more about rooting and twrp recovery installation.
Bootloader unlocking is the first step before going to apply any customization and modification. Once you have bootloader unlocked Redmi Y2, flash custom twrp recovery. It will replace stock Recovery with custom TWRP recovery. Finally, flash magisk zip file using twrp recovery to get root access.
One more thing, twrp recovery installation or rooting process is simple but one wrong step many brick your device permanently or device may stuck in bootloop. So do it on your own risk.
Download TWRP Recovery For Redmi Y2, Root File and Other Files.
| Minimal ADB And Fastboot Tool Download | |
|
| Download lazyflasher-no-verity-opt-encrypt.zip | ||
|
| TWRP Flashing ToolKit For Redmi Y2 | ||
|
| Magisk Flashable Zip File [Root File For Redmi Y2 ] | ||
|
How To Install TWRP Recovery And Root Redmi Y2
In order to root Redmi Y2, download all files [ adb tool, root file and twrp toolkit] and save them on pc. Before going to jump into twrp recovery flashing and root procedure, it must to know that we are going to flash un official twrp recovery on Redmi Y2. Don’t worry, twrp recovery for redmi Y2 is 100% working, tested and stable without any issue.
Step01 Unlock Bootloader Of Redmi Y2
Step02 Install TWRP Recovery On Redmi Y2
Step03 Flash Magisk And Root Redmi Y2
Step01 Unlock Bootloader Of Redmi Y2
Bootloader unlocking is the most important step in order to make any changes on the device. Without unlocking bootloader, you can flash twrp in any how condition.
So use the official method to unlock bootloader of Redmi y2 and then come here again.
Step02 Install TWRP Recovery On Redmi Y2
In this step we will flash TWRP recovery on Redmi Y2 using TWRP recovery toolkit. Method to use of Redmi Y2 TWRP tool is very simple.
Let’s see “how to install Redmi Y2 TWRP Recovery Safely?”
- First off all connect the device with pc and move lazyflasher-no-verity-opt-encrypt.zip and magisk flashable zip file into phone storage.
- Next, download and install “Minimal adb & fastboot tool” on pc. It’s must to install adb drivers and then you can run fastboot commands.
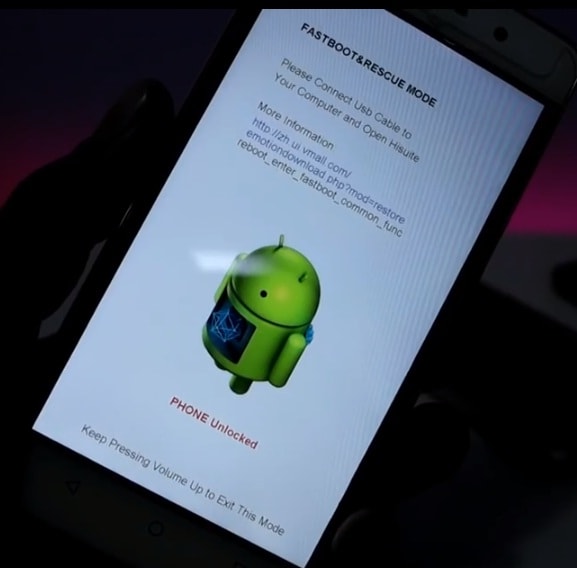
- Now come to the device and boot Redmi Y2 insto fastboot mode manually.

- Connect the device with pc via USB cable. [Device must be into fastboot mode]
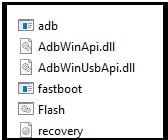
- In next step, extract the downloaded TWRP Flashing ToolKit on pc and run “flash.bat” file by double click.
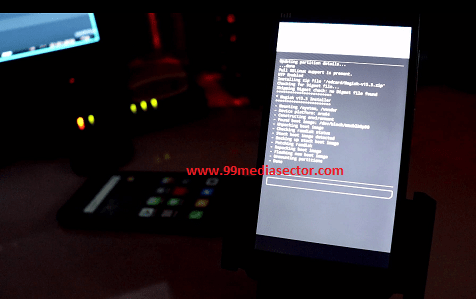
- Once you see the below screen, press any key to continue the process.
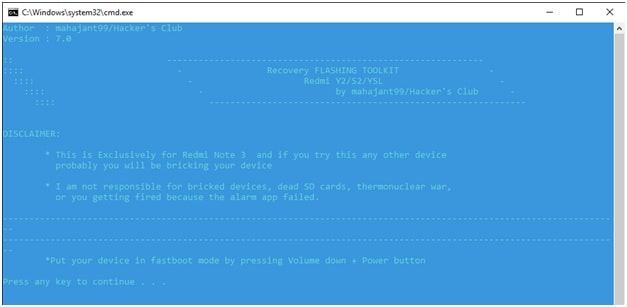
- Tool will detect the device automatically and it will flash twrp recovery on attached Redmi y2 within few seconds. After flashing, device will reboot into newly installed custom twrp recovery.
- Click on “Install” button, browse “lazyflasher-no-verity-opt-encrypt.zip” from phone storage and swipe to allow flash.
- TWRP recovery installation done!!!
Step03 Flash Magisk And Root Redmi Y2
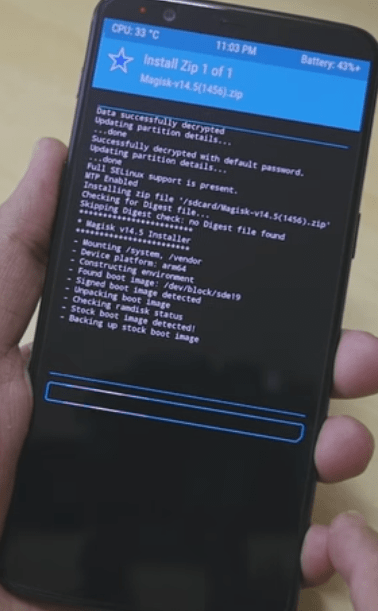
- Make sure, you have already placed Magisk flashable zip file into phone storage.
- Click on “Install” button, browse “Magisk flashable zip file” and swipe to allow flash. Here it may take couple of minutes to flash magsik root package.
- Finally, come to main menu, click on “Reboot System” and reboot the device into android OS>
- DONE!!!
You have rooted your Redmi Y2 successfully. Remember, device may take long time to reboot at first boot. So sit back and wait for normal boot.
Universal Method To Install TWRP On Any Xiaomi Or Redmi Phones
This is complete step by step tutorial to flash twrp and root Redmi y2 using Magisk file. In case, getting any difficulty,leave your comment below.