How To Add Border Around Blog Post in Blogger?
Here in this tutorial we will play with CSS to add border around blog post. We will add some lines of code in your blogger template. By using these lines of codes we can change the background color of the post body by following this tutorial.
Now read continue full post and give a different look to your all blog posts by adding border to blog post. Now see two different method to display border around blog post.
Method 01
Here is an example with screen shot.
Preview Before Adding Border…………………….

After Adding Border Around To Blog Post…………….

Now you can see after adding border around to blog post its looking different and beautiful. Now follow all steps one by one and add border around blog post in your blogger website.
- Login to your blogger website.
- Now navigate to Template in left side bar and click on it.
- Click on Edit HTML …..Expand Widget Templates
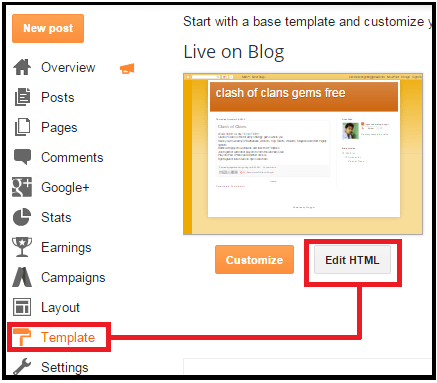
- Now Search for ]]></b:skin> by pressing Ctrl+F
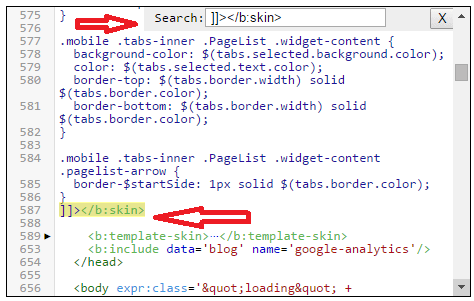
- Now copy the below code and paste (Ctrl+V) this code just above ]]></b:skin>
Code Is Here
.post{border:1px solid  FFFFFF ;border-style:solid;border-radius: 10px ;
-moz-border-radius:10px;
-webkit-border-radius:10px;background: #ffffff ;margin:.1em 0 .5em;padding:0px 8px 0px 8px}
- Click on Preview to check your code and Save Template if its working fine.
Customize the code
- To Change the border color you can replace FFFFFF by your desired color code.
- To Change the border corner curve change the 10Px according to you.
- To change the post backgrounds change the #ffffff by your color code.
So it’s easy or not. Just try it.
Method 02
- Login to your blogger website.
- Choose the blog which you want to edit and click the “ Create New Post”
- Now click on “HTML” button .you can find this button on the top left corner of the screen.
- Now enter the below code……….
Code Is Here
<div style="border: 5px dashed yellow; padding: 10px;">Type Your Content </div>
- Now click the preview to see your post with border and save it if working all well.
- Now if you are satisfied with the result you can publish it for the world.
Customization
- Replace type your content line with your content (post detail) as shown in point 4.
- You can change dashed into solid.
- Change yellow in red or in any color.(values can be either the name of the color such as red ,blue, green or the hex color code.
- Number after padding property with the value of the distance you want your post content to be from the border line.
Example
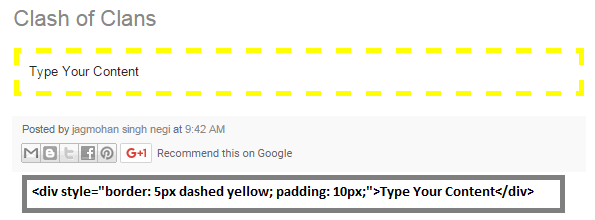
If you are using code like this ………<div style=”border: 5px dashed yellow; padding: 10px;”>Type Your Content</div>
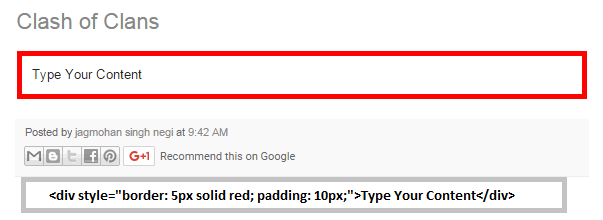
If you are using code like this………<div style=”border: 5px solid red; padding: 10px;”>Type Your Content</div>
Difference between Method 01 and Method 02
- By using Method01 border will be display on your all blog posts of your blogger.
- By using Method 02 you can add border on your desired post.
- If you are using Method 01 then border will cover your title and post conten.
- Method 02 will cover only post content.
So its all about the tutorial. You can implement any of above method to add border around to blog post in blogger.please feel free to write us if you get any problem.